Monday, May 4, 2020

A Little Armchair Travel

While incredibly important, staying home is definitely difficult. I work part time at a museum as I've spoken about before, and I have appreciated the solidarity among the guides during our closure period. To feel a little less isolated, I've been virtually visiting places I'd love to see in person someday. This is actually a very 19th century approach! As photography became more prevalent in the mid-19th century, you could buy images (especially "stereo", or 3D, images) that showed faraway places unreachable without extensive travel. Of course, we've come a long way from squinting through a stereoscope...modern options for "armchair travel" include panoramas, videos, and interactive tours.

Home of Louisa Alcott, Concord
stereocard: "home of Louisa Alcott". Undated, but likely late 1870s? (via BPL)

I thought I would share a few of the virtual tours I've explored over the last few weeks. I tried to pick the ones that I thought had the best virtual experience, but there were so many more I found! Definitely check to see if a place you're interested in has a virtual tour up right now.

Most of these are free, but some are behind a paywall that goes to support the museum. (Since museums are being hit incredibly hard, this is a nice way to help support them right now if you can.)
I hope you enjoy this list! And if there are any great virtual tours you recommend, I would love to hear about them.

Orchard House (Concord, MA)
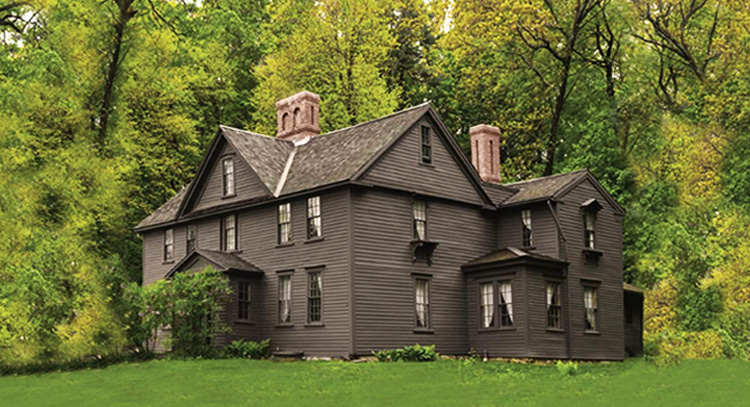
Orchard House: Home of Little Women — Network Ireland Television

I'm partial to this home of the Alcott family, as I've worked there since 2005. The historic house museum was the home of Little Women author Louisa May Alcott, along with her family. Their history covers many themes that still resonate today: educational reform, women's suffrage, abolition, and class inequality were all an important part of the Alcotts' time in Concord. You can rent a virtual tour here, and check out free posts highlighting specific artifacts each week.


Villa Lewaro, the Madam C.J. Walker Estate (Irvington, NY)

A new life for Villa Lewaro, grand home of the country's first ...

This grand Italian renaissance-inspired villa was owned by Madam C.J. Walker, the first black female millionaire in the U.S. Walker and her daughter A'Lelia were both important figures in social movements of their time: during her lifetime Walker championed programs for black women's economic independence and was a vocal advocate for the anti-lynching movement. You can tour the estate for free here, with narration by Walker's great-great granddaughter. In 2018 the site was purchased by the New Voices Foundation, and you can read more about them (and donate) here.


Winchester Mystery House (San Jose, CA)
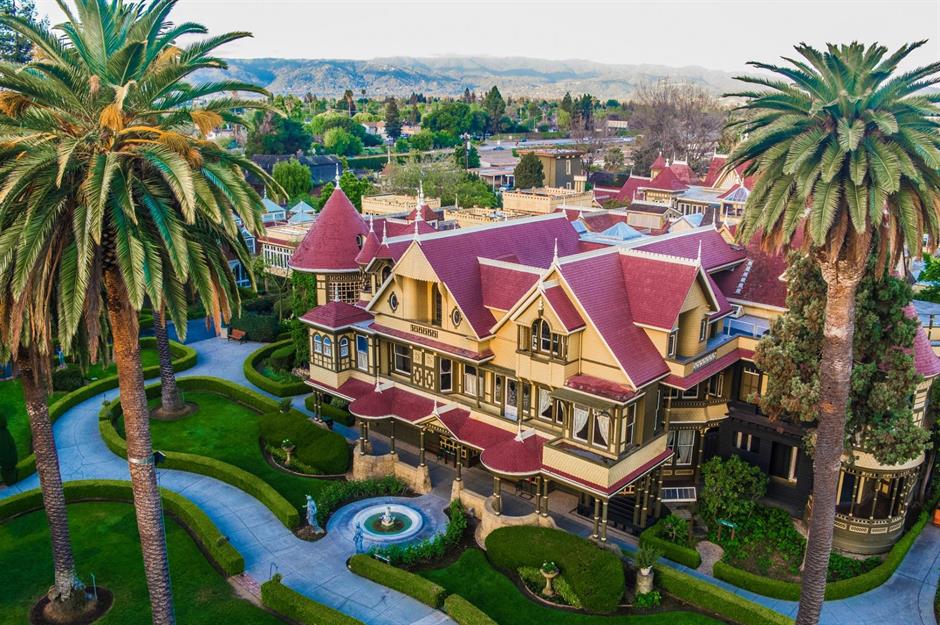
Is this America's strangest house? | loveproperty.com

I will never let Mr. Plaid live down the fact that before we were dating, we were in San Jose and he would not tour this house with me! The Winchester Mystery House began life as an 8-room farmhouse purchased by Sarah Winchester, heir to a large part of the Winchester gun manufacturing fortune from her husband. Between 1886 and 1922 Sarah Winchester pretty much constantly added or re-did parts of the house--upon her death the structure had 160 rooms. No one knows why, but there are a lot of (very haunted) theories. The house itself is weird and beautiful, and Sarah Winchester was fascinating person. You can rent or buy a video tour here, or opt for the 360 tour (which I have not tried!).


The Frick Collection (New York, NY)

My New York Obsession: A Throne Fit for a Frickin' Queen at the ...

The Frick has a reputation for its incredible art collection (it is an art museum after all), but I was intrigued by the description of the museum as "the last Gilded Age mansion on Fifth Avenue." All that Wharton immediately made me perk up at that! It was very cool to get a peak inside this very fabulous space. You can see the virtual tour here, which is free and includes an audio guide.


Museo Frida Kahlo (Mexico City, Mexico)
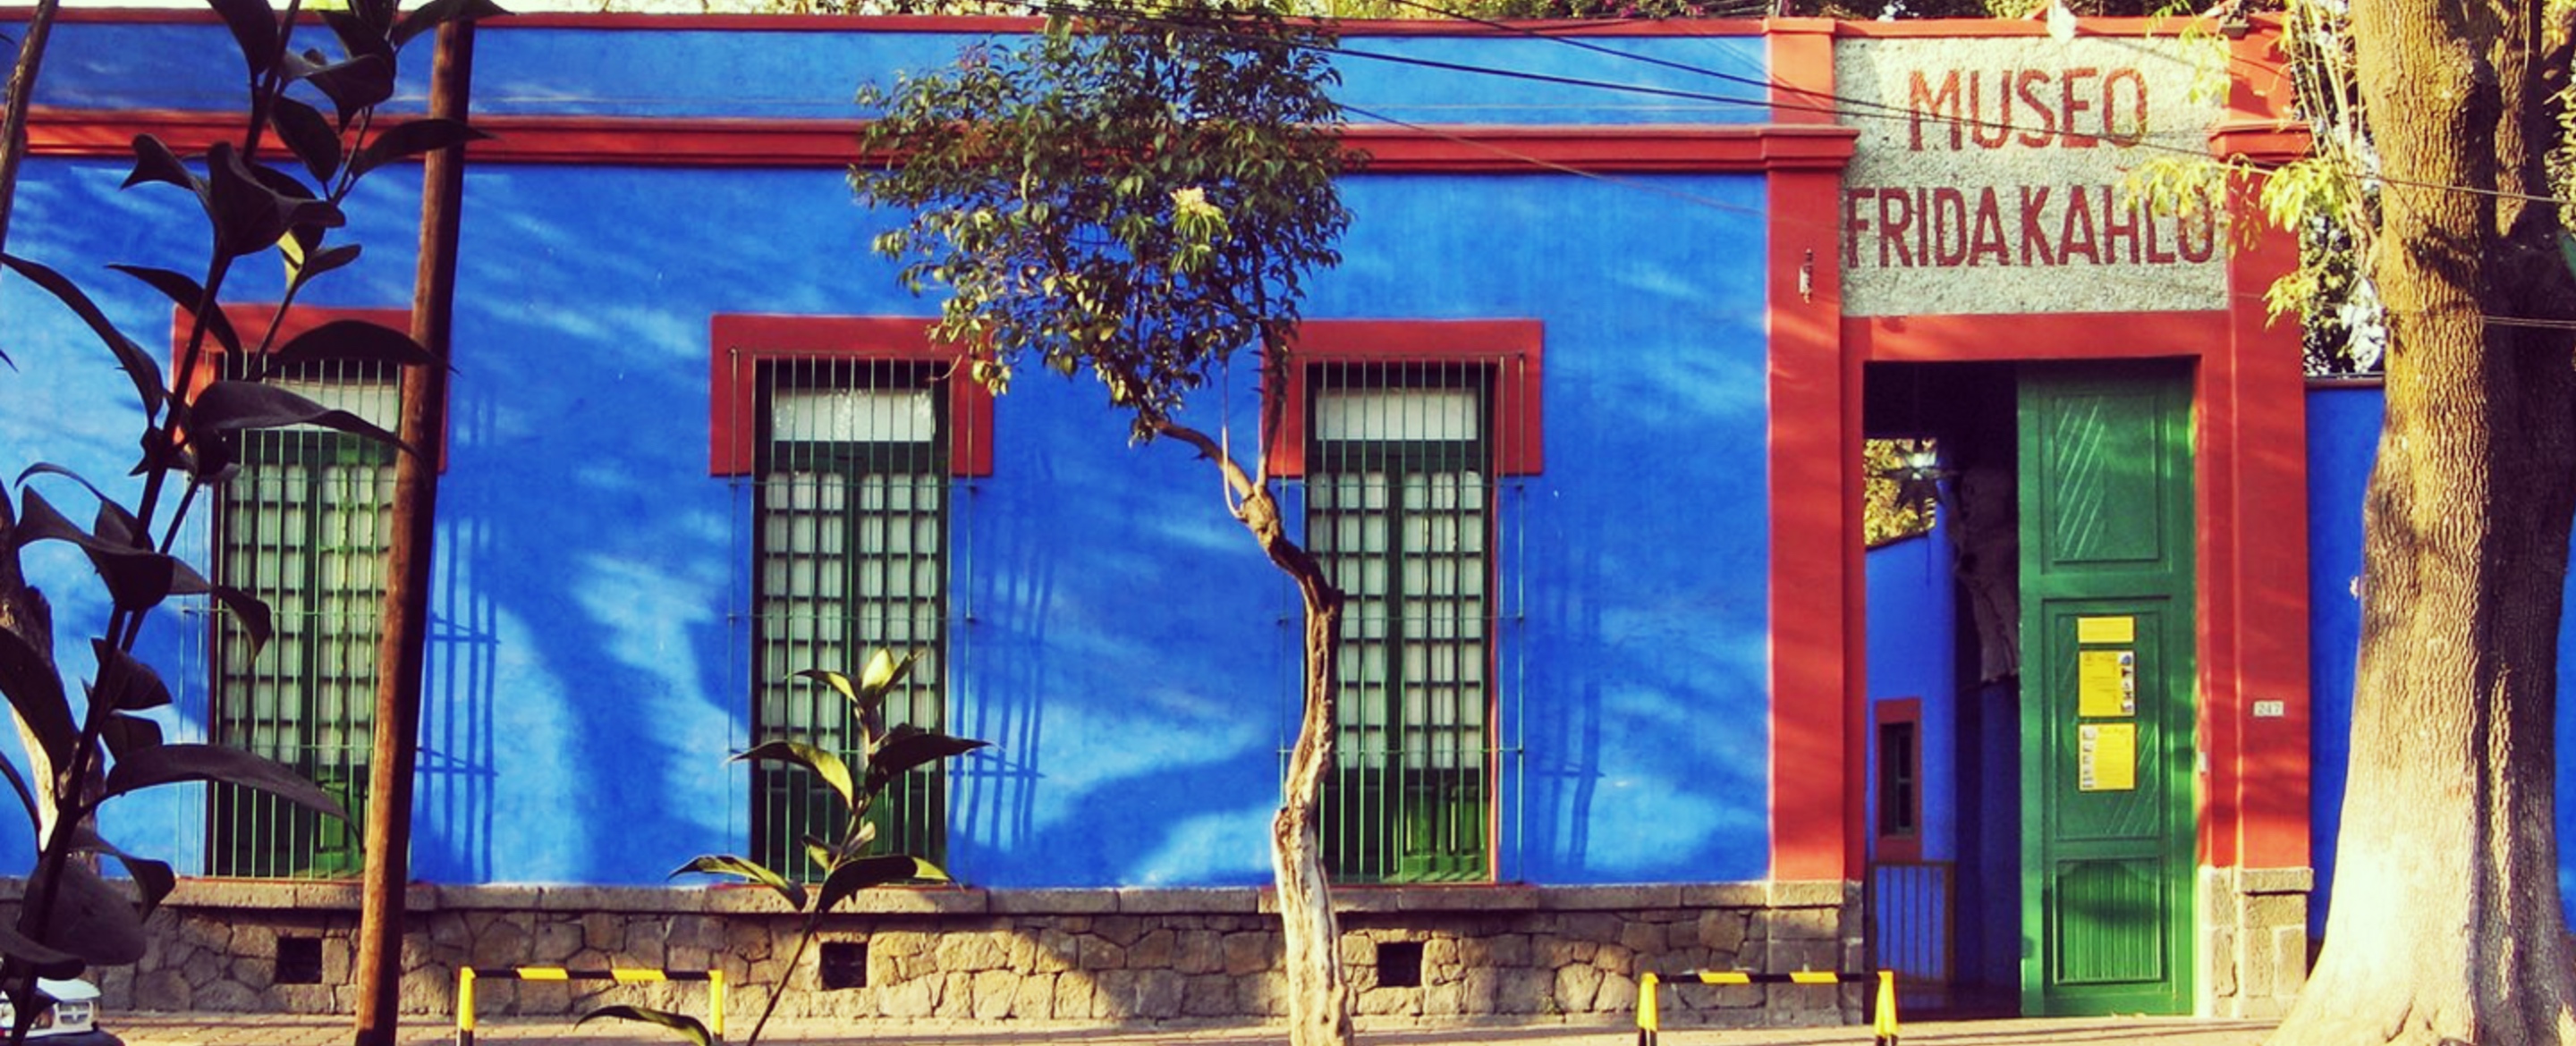
Casa Azul: a glimpse into Frida Kahlo's world – Museeum

After her death, husband Diego Rivera donated the home of artist Frida Kahlo to become a museum to her life and legacy. During her life, Kahlo was a revolutionary whose art drew from Mexican folk culture and her struggles with chronic pain. Her work focused on reclaiming identity--both her own femininity outside beauty standards and Mexican culture freed from colonialism. The museum has a free photo walk through here, but there's no guide--I recommend reading the information on the rest of the website and at the Frida Kahlo Foundation.

Royall House Museum and Slave Quarters (Medford, MA)

One house, two histories in Medford - The Boston Globe

The 18th century home of the Royall family is an important look into enslaved peoples' experiences in the North. The site of the wealthy Royall family is currently the only surviving slave dwelling structure in New England, and the historic site's mission to share the experiences of everyone who lived there is so important for understanding U.S. history. The museum does not have a special guided tour during quarantine, but was previously feature on Stuff You Missed in History Class. You can watch the video here and see the museum's site (with information about how to support the organization) here.


Edgar Allen Poe House & Museum (Baltimore, MD)

Poe Baltimore | The Museum

I'm including this one specifically because the Poe museum is doing live guided tours of the site via Zoom, which is really cool! You can find out more about signing up for this pay-what-you-can experience here. The Poe museum has actually been on the forefront of incorporating technology into the historic museum experience for a while--I wrote a paper on them in grad school--and I love that they're finding ways to bring the site to life right now.


Lippet House Museum (Providence, RI)

filmed at lippitt house museum - Google Search | House museum ...

I'm ending on a slightly different kind of tour: this guided tour is entirely in American Sign Language. I was able to spend an afternoon at the Lippett House last summer, and really enjoyed seeing the beautifully preserved rooms and learning about the cutting edge technology (for its time) used throughout the home. Henry Lippett designed the home and had it built for his family in 1865, 10 years before he became governor of Rhode Island; his interest in technology is reflected in the "modern" advances built into the house, like central heating. After their daughter Jeanie became deaf from scarlet fever at age 4, Mary Ann Lippet became an advocate for deaf children's education and founded the Rhode Island School for the Deaf with her daughter in 1876. You can read about the house and watch the ASL tour playlist for free here.

Friday, April 17, 2020

Breakfast Cap for a Bride, 1860s

I have an ongoing fascination with caps. I think they're absurd. Also, I kind of love them?

Usually my focus is on Regency caps, because the only reliable daytime event I go to these days is the tea at our annual Regency dance weekend. But every now and then I come across a later period cap, and I tuck it away. While I was working on my 1860s morning dress, I came across a particular description for a breakfast cap that seemed serendipitous:
Godey's Lady's Book, December 1861 (via)
"NOVELTIES FOR DECEMBER...Breakfast-cap for a bride (a fashion becoming more and more universal since breakfast caps are now made extremely piquant and becoming). Material spotted thulle [sic], trimmed with roses and rose de chine ribbon."

I think a combination of being newly married myself and finding spotted tulle while at the craft store for something wholly unrelated lead me to decide that I needed a breakfast cap to go with my morning dress. I ended up taking inspiration from the description above and the general shape of these two extant caps from the period.

Black net cap
black net cap, French, from the MFA Boston
1863 Godey's. "Breakfast caps. 1. ...of French muslin trimmed with violet ribbons. 2. ...in the form of a net trimmed all round with a double row of blonde; two ribbon streamers behind. Three roses make a pretty bandeau to the front of the cap. Black or white net may be used for the purpose, and whatever colored ribbon best suits the complexion of the wearer." [jrb]
breakfast caps, from Godey's 1863
And then I made it up. I knew I needed a structure of some kind, so I ended up using black velvet ribbon to make a base shape. Then a gathered a circle of spotted tulle to the ribbon, and trimmed the hell out of it.

Ribbon base

completed cap
I did depart from the description on the colors: mine is trimmed in blue silk ribbon and purple flowers rather than roses and pink ribbon, but both the ribbons and flowers came to my stash from wedding gifts. So I feel like that doubles down a bit on the "bride"-iness of the cap and it makes me happy! 

cap, hair, and dress
In the end, I should have pinned this in a bit better. It slid back from the center of my scalp where I had intended it to sit. Also, by the time this picture was taken my loosely styled hair was falling pretty considerably. But even so, I'm really pleased with this first foray into caps! It's absurd, which is just the way I like it.

Sunday, April 12, 2020

A Dress for Staying Home: 1860s Morning Robe

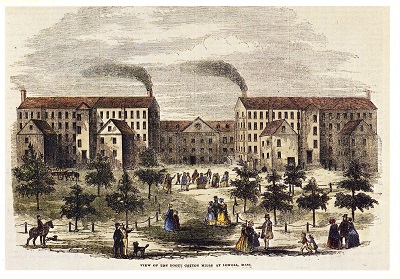
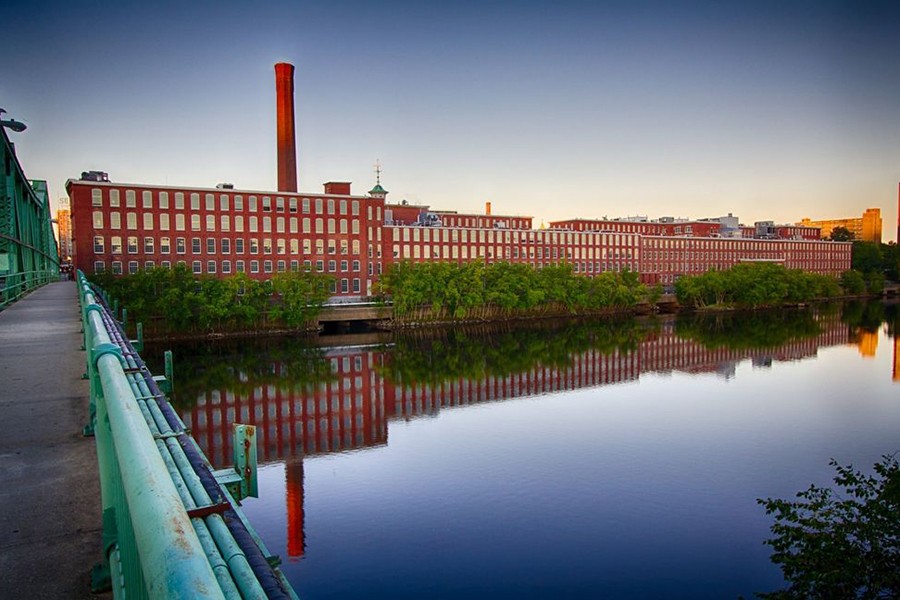
Back in December, I bought two lovely reproduction print cottons on a Little Women movie high. Printed cotton always feels very appropriate to me for New England, as between 1810 and about 1840 the Massachusetts textile industry was one of the largest in the country (and is where the power loom was invented). The Waltham-Lowell system of fabric production introduced two major ideas to fabric production: 1) going from raw material to a finished product (fabric) with all processes happening within the same factory building, cutting down on transportation and logistics; and 2) primarily employing single young women. These factors helped to shape the production of cloth in America for much of the early 19th century, and helped give the group of mill owning families known as "the Boston Associates" significant financial clout. The textile industry shaped the state as I know it today: 45 mill towns were established in MA in the first half of the century, and the mill owners also invested in the establishment of railroads and water power sites.

The Mill Girls of Lowell - Lowell National Historical Park (U.S. ...
period illustration of a mill campus in Lowell, MA

Of course, during the 1860s new cotton fabric would be difficult to come by--the economies of the North and South were closely linked through cotton textile production, and so the Confederacy placed an embargo on raw cotton. With a lack of raw materials or employees (as many mill workers, known as "mill girls," volunteered as nurses or went home to fill in for men who had joined the army), many mills shut down until after the war. But there are so many mid-century cotton dresses, I think the association has stuck for me.

Boott Mills, Lowell (now apartments)
But you came here for the clothes! So back to that fabric order...I ordered 2 prints, one dated c. 1860 and the other dated 1830-1845. The 1860 print seemed perfect of a very particular impression-inspired dress, but I had didn't really have a vision for the earlier print. I just really liked it when I saw it on the store website. Xena approved as well.


At some point over the next few months while I was busy with other projects, this fabric started to tell me that it wanted to be a morning dress. I spent some time looking at extant morning dresses and fashion plates, and started to get some ideas--specifically, many of the originals I liked were trimmed with quilted silk, and I happened to have some in the stash!

The term "morning dress" referred to relatively simple dresses that closed in front, and were intended for wear around the house. Several styles appear in magazines, including a sack coat and matching skirt, a fitted dress with no waist seam, and a dress belted to define the waist (with or without an actual waist seam separating the bodice and skirt). Two notes I found interesting while looking at issues of Peterson's and Godey's Lady's Book for this project were that morning dresses intended for interior wear (as opposed to walking dresses or morning walking dresses) were noted as often trimmed with velvet, embroidery, or quilted silk; and that apparently in France morning petticoats were more expensive than morning dresses, because they were so finely trimmed or embroidered. This actually makes sense, as many morning dresses are open in front, revealing the petticoat.

Peterson's Magazine September 1863 blue wrapper.
Morning dress, 1863, with embroidered, tucked, and ruffled petticoat visible in front (from Peterson's Magazine)
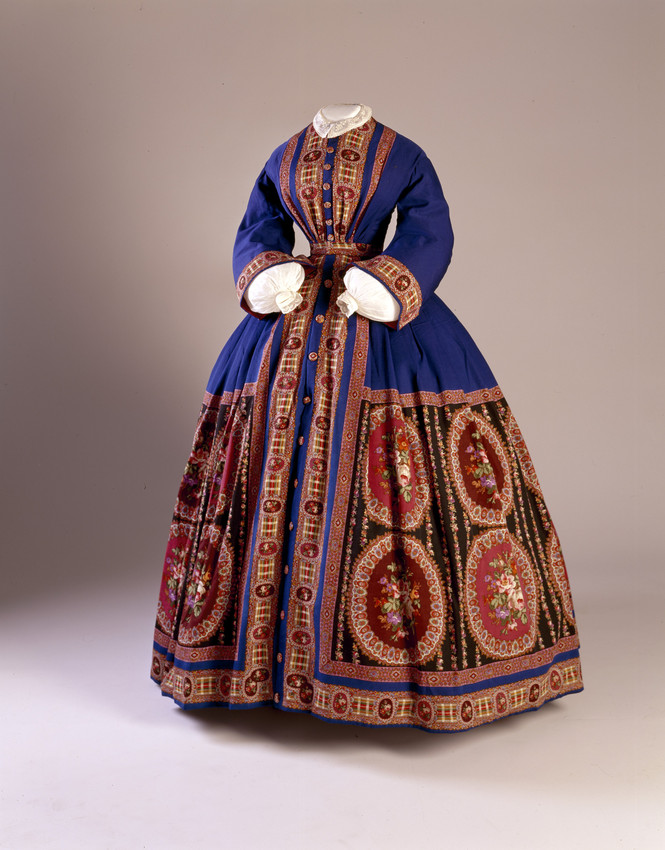
Extant morning gown, wool, c.1860-1864 (Historic New England)
Printed wool morning robe with quilted silk trim and patch pockets, 1860s (Augusta Auctions)

You can see my Pinterest board for this project here, but in general here were the elements I decided I wanted to incorporate:
-button up bodice
-full sleeves with cuffs that open to undersleeves
-quilted silk trim
-a patch pocket
-a belt with a bow

I also decided that since this project was not for an event (shocking, I know!), I was going to use it as an opportunity to focus on small details. So I made a particular effort to pattern match at the center front overlap, do something fun with the pocket (cut from scraps, so still an efficient and period use of fabric), and carry the decorative piping to the belt. Overall, I'm incredibly pleased with how it turned out!


(Please excuse the sad photos, obviously locations and materials were limited! Plus after I ironed the sheet it feel down and got wrinkled.)

The dress uses the Past Patterns 701 bodice, which has a nice full look from the gathers at the front and back. Then I altered the sleeves to be open at the bottom and stop just above my wrist, allowing my undersleeves to fill in the space below. The skirt is just rectangles finished at the front edge without closures and gathered to the waistband. The quilted silk trim is sewn on top of the bodice and skirt fronts, and finishes the neck and sleeve edges. All of the quilted strips are edged on one side with bright green silk piping.

Fiddling with button placement while I could still lay out the front pieces flat

Piping what became the top edge of the sleeve cuff
 Aside from the cotton (which admittedly was the bulk of this project), everything else came from the stash: acid green silk for the piping, quilted silk for the trim, lining, and an old "create your own buttons" kit I found in a large collection of miscellaneous buttons I was given several years ago. It was nice to use so many things that have been around for a long time!

This dress also gave me a chance to try out several new techniques, including patch pockets and hand-worked button holes. I actually really enjoyed doing the button holes, and will no longer avoid buttons on projects! The patch pocket was less intimidating but equally fun to do. It's stupidly large because I wanted to be able to carry my cell phone in it if I'm wearing this for living history programs in the future. To ensure my phone would fit I traced my phone onto a piece of pattern fabric and then measured a pocket around it that seemed reasonably sized.


Then I folded the pattern in half and added a seam allowance, so that I could cut 2 pieces to create a chevron on the pocket. Because why not?


Since I've only worn this for photos to date, I haven't needed to carry my phone around. But I know I can, and that's what matters!


The final element of this ensemble is the belt. Many of the morning dresses I looked at for inspiration had tie belts with tassels, which are very cute. I liked the idea of a belt but worried a tasseled belt would push this more into wrapper/negligee territory than I wanted. But then I found this illustration with a fun bow belt:
Period illustration, via

I decided to go in that direction and make a belt with a bow. I also piped it with the same acid green silk as the quilted trim on the dress, similar to the way the scalloped edge and lace are carried from the dress to the belt in the illustration.

I forgot to take pictures of the belt construction process, but it consists of a long belt piece, a square that becomes the bow, a small loop for the bow center, and 2 tails. The tails are sewn to the back of the loop, and then the large square and the belt are threaded into it. It makes the whole thing rather compact and gave me control over each element individually, which I think worked out well.

excuse the weird angle...bow selfie!
Since it will be a while before I can wear this out and get help with photos, I decided to entertain myself this weekend by setting up a photography studio in our bedroom. I had planned to be totally self sufficient, but after a small disaster falling off a chair, losing my carefully hung bedsheet-as-backdrop, and having the cat escape (I was trying to get her to be in photos like period cats!), Mr. Plaid stepped in and decided it would be better for everyone if I had a photographer.


Considering he has never used my camera before, and I was posing in front of a bedsheet taped to the wall, I think he did ok!


I look forward to making a fancy petticoat to wear under this in the future, but for now the simple look matched my mood. This was definitely a "make do" sort of photo shoot. But I appreciated the comfy-ness of this ensemble and the opportunity to experiment a bit with period hair without the looming deadline of a ball.


In the end, this project had somewhat ironic timing: as we're all staying home these days, it's rather appropriate to have a dress for wearing around the house. But I look forward to wearing this out in the future, for living history programs or just having friends over for brunch! In the meantime, I'll crack open a good book and continue to try to rope the cat into photos.

I hope you are all well!

Saturday, March 7, 2020

Avada Ke-jodhpur

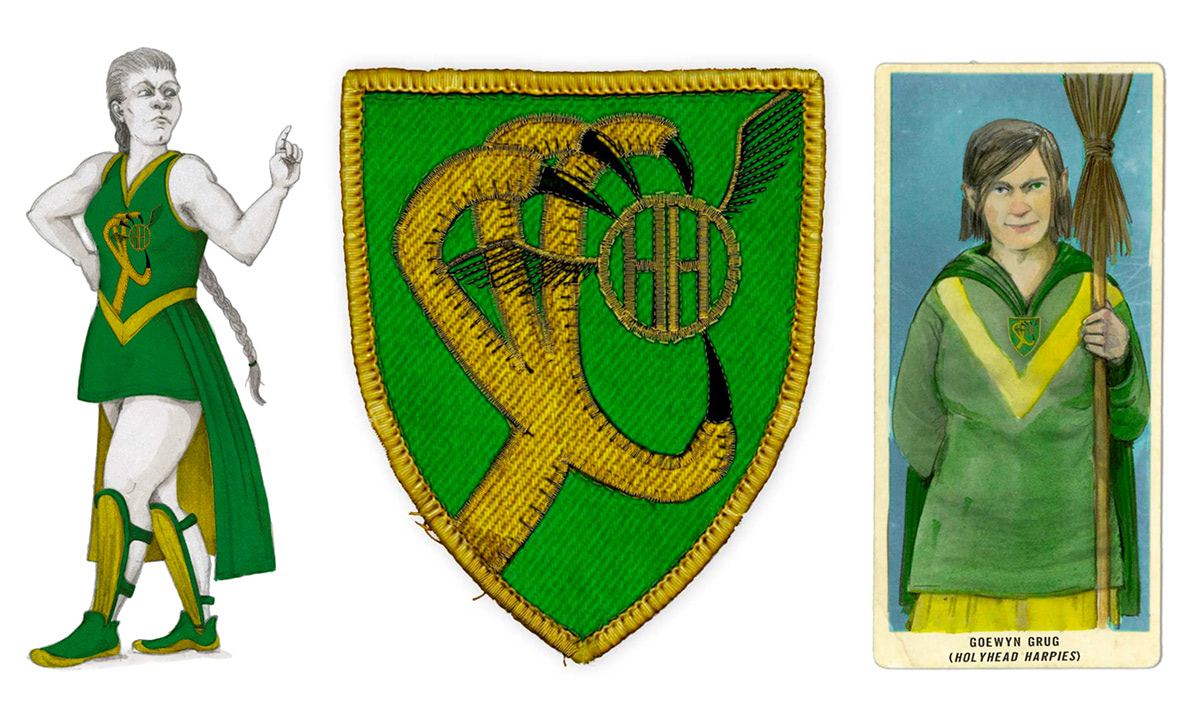
I have loved the Holyhead Harpies for a long time--which is saying something, because sports aren't typically my jam. But an all-witch quidditch team really spoke to me, and on my first trip to  WWoHP several years ago a Harpies t-shirt was the only memorabilia I brought home. I've wanted to make a Harpies outfit for Halloween/our local sci-fi convention in past years, but since sports aren't really my jam I was having trouble getting behind a set of quidditch robes. They just look so...sporty. Not to mention I'd never be able to wear them when not doing a Harry Potter Thing.

Image result for holyhead harpies
HH illustrations by Emily Gravett from the upcoming illustrated edition of Quidditch Through the Ages

But then this fall, as my annual desire to make a Harpies uniform for Halloween re-emerged, I saw a string of Instagram posts by Emily of @sewingfrankly and Lauren of @thecosplayhistorian in which they wear adorable vintage Hogwarts uniforms and Yule Ball gowns. Which inspired me to think about vintage Holyhead Harpies--much more useful, and much more me!

yes, I am generally a ham, but the look of trepidation towards the quaffle is just naturally my face when a (sports)ball is involved.
I was even able to talk a friend into embarking on this silly project with me, so there were two of us! That's practically a team, right? Another friend happened to have a green and gold 1930s dress already, so she was dubbed our coach. I'm really pleased with the way these turned out, and running around the convention with a quaffle was a lot of fun.

suffice to say: shenanigans ensued.
 Unfortunately, hotel lighting is not the best for pictures...so someday (hopefully) soon we'll do an outdoor shoot and then I can share details of the full outfit. But for today, I wanted to share a bit about my construction process of making the jodhpurs. It was...not a great process.

bubble butt, 30s style
When we decided to do vintage uniforms, I was most inspired by images like this, this, and this of early 1930s women in jodhpurs and sweaters--so that's what I set out to make. I couldn't find many patterns for vintage jodhpurs floating around the internet, but Butterick makes one (B6433) currently marketed as ideal for 20s lady detectives.

image from the Butterick pattern site of B6433. Hmmm, doesn't that ensemble look familiar? ;)
 The best thing about commercial patterns is that they tend to go on sale...and since I was shopping over Thanksgiving, I snagged both this pattern and the Simplicity retro pattern we used for the sweater for a dollar or two each. And once they arrived, I set to work!


After tracing the pattern off of the tissue, I made a mockup of the jodhpurs (without pockets) to check the fit. I ended up adding an inch to the hips, as they were a little tight on me, but otherwise things seemed fine and I moved on to cutting out my fabric: a lightweight wool houndstooth from the stash. Then I started construction--which is about when things started to go wrong.

It's been a lot of years since I used a "big 4" pattern, and I wanted to make sure I didn't cut corners. So I dutifully followed the instructions...or tried to. It turns out, the instructions were either not proofread, or everyone who tried them out ignored some bits, or they were all on a brain wavelength I was not accessing. Seriously, there were multiple steps where I either couldn't figure out what the instructions wanted at all, or after I did what the pattern described I realized that what was described was exactly backwards and I needed to do it again. UGH.

In an effort to understand what was happening, I spent a lot of time looking online for other people who had made this pattern and might have some advice to share. I couldn't find much, so I wanted to include as much detail as possible for the next person who gives this a try. (And on the flip side, if you've made this and know what I did wrong I'm happy to learn from the comments!)

So here we go!

Problem #1: The leg facing instructions end up with the wrong side out
I don't actually have a good solution to this, besides just sewing it in the other way. Each side of the ankle opening has a different facing: the self-facing and the facing.  On the self-facing side, the self-facing is basically an extra bit that is cut out as part of the pant leg, and should end up sewn wrong side to wrong side with the pant leg, so that it looks like a normal facing. This one is easy, although I am unclear why it needed to be cut as part of the pant piece and couldn't just be a normal facing.
On the facing side, the facing piece should basically hang out from the edge of the opening like a placket. When I followed the instructions, this worked...except that the wrong side of the fabric faced out. But knowing what it was supposed to be, I just ignored the instructions and sewed it the other way.

completed (corrected) facing from the inside

on the outside, this functions as a placket and goes underneath the other half of the opening (I sewed snaps on after this)


Problem #2: The front extension is never explained
After sitting with my friend and failing to figure out what the "front extension" was, I eventually was reduced to scream-crying in the kitchen while Mr. Plaid* attempted to make sense of it (no, he doesn't know anything about sewing). Eventually I thought I had it figured out--and then either I was wrong, or something about the pattern just doesn't work. Here's the pattern instruction for this step/this piece:

Notice how the extension is never shown in context of the rest of the garment? Yeah. That would have made this a lot easier! Basically where I landed is that the extension is sort of the waistband piece for the top of the back of the pocket. After attached the extension to the top of the pocket, the raw edge of the piece ends up inside the back facing when you turn under the edge of that piece and stitch it down. Unfortunately I didn't take pictures while I was doing this, but here's the piece in its final position (inside and outside). Again, this wasn't hard once I figured out what the instructions wanted me to do!

the front extension (with button hole and button) from the outside

and from the inside--notice the back waistband is folded over the raw edge of the extension before being sewn down

Problem #3: The dots don't work
The final step of construction is to sew the outside seams of the legs together from just below the knee (i.e., the top of the ankle opening) to mid-hip (i.e., the bottom of the waist opening). The pattern instructions say to match the dots on the pattern pieces and sew in between them. Except when I did this, I ended up with a front and back that were about an inch off from each other.

that super sexy pointy hip situation is a result of the fronts being longer than the backs

here's the difference when the pants are laid flat
Once more, an easy fix once I knew the problem! I ripped out the seams and re-stitched, this time matching the waists and pockets rather than the dots. Full disclosure on this one: the bottoms are a little off, so this wasn't a perfect solution. But since I never plan to wear these without boots, I'm not going to worry about it. (I think if I did want to fully fix it, I would need to re-hem the pants, correcting for the length in the hem.)

Bonus round: the pockets are also the closures
This one isn't actually a problem with the pattern, it's just really silly. The jodhpurs close with a series of buttons (mine are brown vintage Bakelite in two sizes) up the hips and at the overlapped edges of the waistband. Since this is also the location of the pockets, the pockets basically only work as pockets when the jodhpurs are fully buttoned--as soon as you unbutton them, anything inside is wont to fall out. Why??? Maybe it's period? But it seems ridiculous.

So while these jodhpurs almost killed me to make, they came out really cute in the end. I have a lot of this fabric left, so someday I'll hopefully make a matching jacket for bicycling and other "tweed" outings. But in the meantime, I look forward to further adventures on the only all-witch professional quidditch team in the league!

courtesy of Nerd Caliber

Thursday, January 23, 2020

Goodbye 2019, Hello 2020s!

January is often a time of year for reflections on the past year and making plans for the year to come. January also happens to be the time I attend our local sci-fi convention, and this year that means I've already completed my first project of 2020! I'd like to take this as a sign of productive things to come.

But before I post about that, I thought I would take a look back and see how I did in 2019.

January-March


April


May-October


So I completed 3 whole projects. My goals for the year were:
Early 1870s winter ensemble yup!
Regency pelisse  I swapped this out for a Regency ballgown, but I'm counting it.
Tartan 1860s re-make yup!
Chemises and petticoats I ended up getting help from a friend here. So while I can't really count this as done, I am giving myself partial credit because I have updated my period undergarments so I no longer have only one chemise from 2007 ;)

Bonus Round: something new for Fezziwig's next year nope.

Additionally, I wanted to blog more and focus on having accessories for all ensembles. I definitely succeeded on both counts. I posted 11 times in 2019: 4 research posts, 2 construction posts, 3 completed project posts, and 2 miscellaneous posts. That is a large improvement over 2018, when I posted 3 times total! And on the accessories front: I wore jewelry, hair ornaments/hats, and gloves with every outfit...not just the ones I blogged about.


My blog output (and sewing output) increased a lot towards the end of the year, which makes sense given the busy life events that happened. In May and June I was out of the country for work for about 6 weeks, conducting research in Japan, France, Germany, and England. And then in October I got married!

My goals for this year are:

-1920s "tweed" ensemble
-1860s day dress
-1830s dress in cotton
Bonus round: regency dress with long-sleeved chemise (so I can wear it for day and evening!)

Again, this is a small list of goals. But I can't really expect to slow down a whole lot this year (that said, not planning a wedding is already going a long way towards my mental energy for sewing), and I want to set goals I can accomplish without stressing myself to do things without enough time. And speaking of time--though it requires a lot of time, I've really enjoyed my return to research posts over the last few months. So my extra goal this year is more research-focused posts, including some food experiments!

So thanks for sticking with me, thanks for reading, and here's to an optimistic 2020 :)