Showing posts with label 19th century. Show all posts

Tuesday, September 27, 2022

Finally wearing my (white)work

While stuck at home in 2020, I had a hard time transitioning to being on the computer so much when my job had previously involved a lot of human interaction. (Meetings, I mean meetings.) To help myself focus, I turned back to an old trick I used to keep my mind and hands occupied while in college: embroidery. I would plan projects and practice stitches at night, and then work my way through the project during endless zoom calls.

I started with a crewel pocket, because I felt more familiar with the stiches and it gave me a chance to try a bunch of different things.

photo of the finished pocket on natural undyed cotton with colorful flowers, vines, and blue birds embroidered on it
also, birds!

After that, I decided to try something different and ended up settling on whitework. Traditional whitework includes a variety of different styles and techniques, all executed in white thread on white fabric. I've always loved white on white embroidery - I made some truly disastrous attempts at applying it to corsets back in the day - so lockdown seemed like a fine opportunity to really take my time and learn. For that task I turned to the excellent books and online materials from the Royal School of Needlework: for this project I referenced Whitework RSN Essential Stitches Guide by Lizzie Lansberry as well as the RSN's online stitch bank

As a first project, I decided to make a mid-19th century collar. Separate collars and cuffs were common throughout the 19th century as they could be tacked on to different items and removed for cleaning. It's one of those little bits that makes an ensemble feel really lived-in...and also something I've been sadly lacking for my daywear. So a practical, small thing I could actually wear and wouldn't be too big to bite off seemed ideal!

I settled on this collar from Godey's Lady's Book September 1856:

page from godey's with an image of the collar to be traced and instructions above it
embroidered collar with grapes and leaves, via

I started by tracing the original source pattern from my computer screen onto a sheet of paper with pencil, and then went over it with sharpie to create a pattern I could save and re-use. Next I traced that pattern onto a scrap of lightweight cotton using a water-soluble embroidery pen. Then I got to stitching!

a picture of the collar in progress, with the blue pen tracing visible and some white stitching in place

The vines are stem stitch, and the grapes are eyelets, and the leaves are outlined in backstitch. The instructions accompanying the pattern in Godey's say to fill in the leaves with backstitch but I decided I liked the look of the leaves better with just the outline, so that was what I did. (I intentionally started at the back of the collar, so all my initial awkwardness and mistakes aren't super noticeable.)

Once the collar was done I cut it out, hemmed the neck edge using a rolled hem stitch, soaked it to remove the embroidery pen, and ironed it over a towel. And then it was done! But given this was Spring of 2020, once it was done...nothing really happened. I think I posted a photo on Instagram, and that was that.

the author in a purple printed 1860s dress and gray felt hat standing in a field

Fast forward two years, and I have finally worn this collar out into the world! As would have been done in the period I tacked the collar into the bodice of my purple reproduction print 1860s day bodice, which closes in front. (And which I have been wearing since 2013! and still have. not. trimmed. Seriously, this is next...)

I didn't exactly get it on center, but aside from that I am immensely pleased that this little piece has made it out into the world (or at least as far as CT!), and that it made the dress feel complete. Now I want to make more collars! For now, here are (finally!) some pictures documenting the fact that yes, I made a thing, and even better, I wore it out.

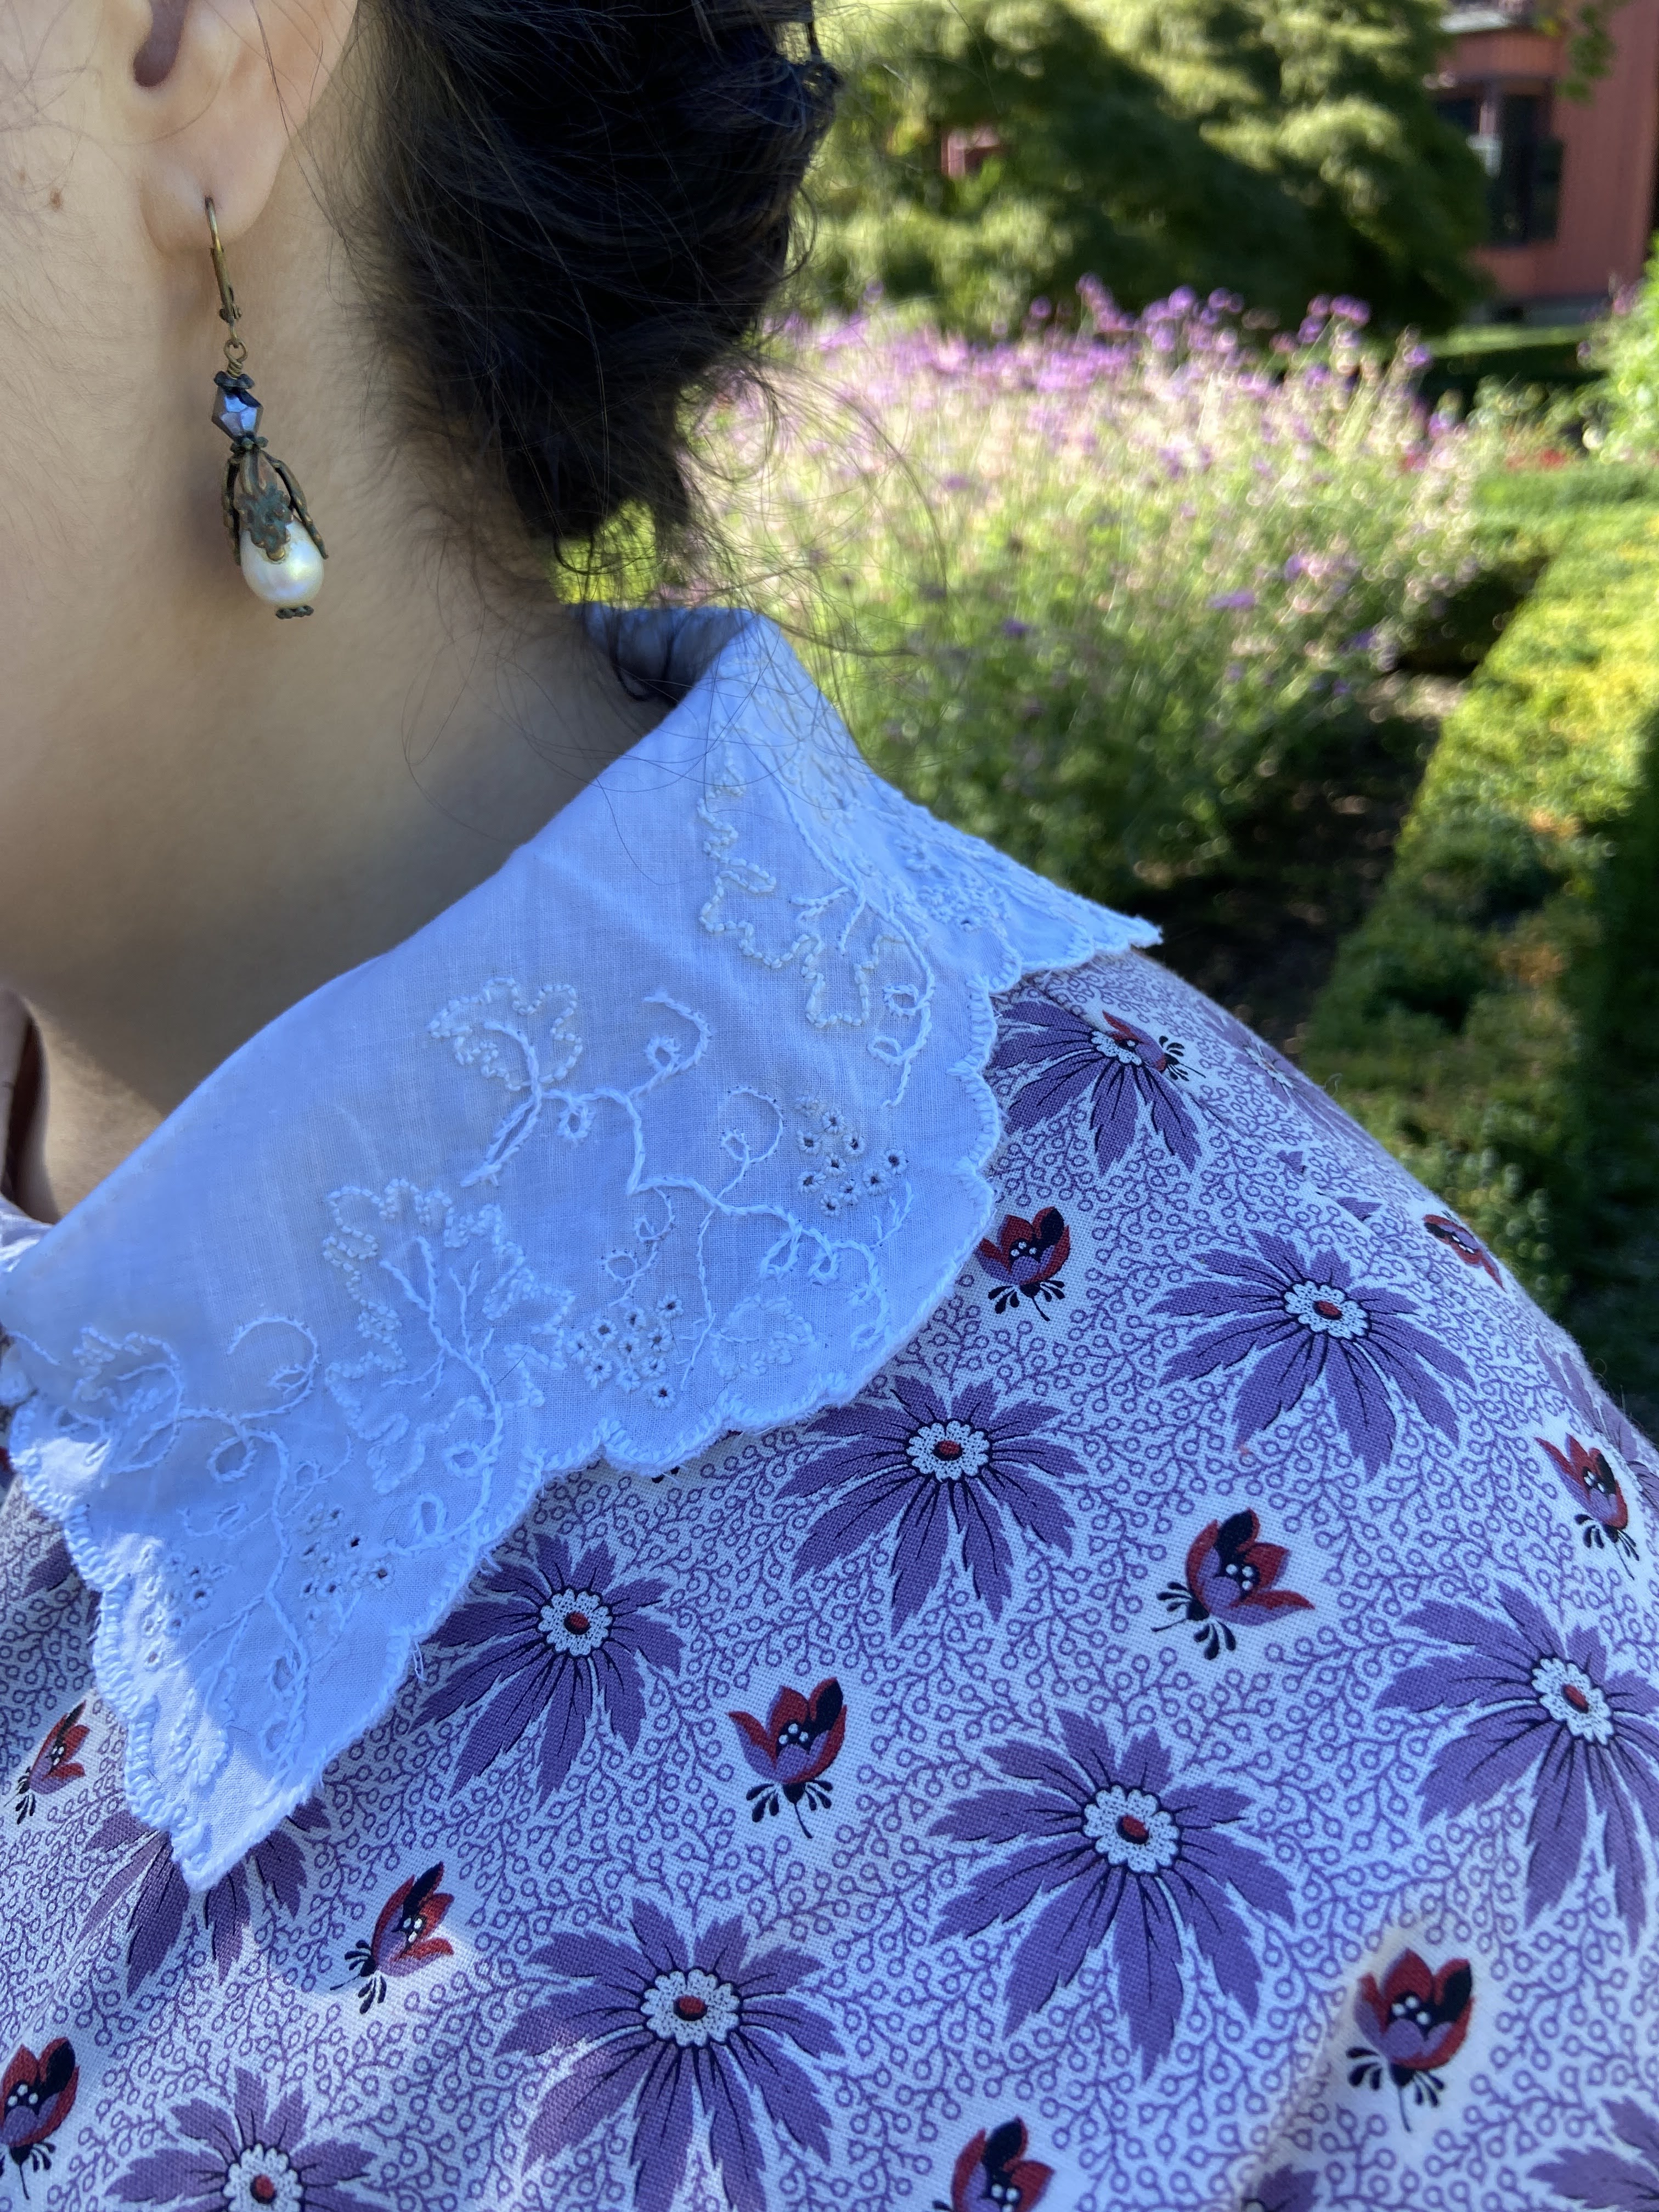
the author from the shoulder up standing in a garden wearing a printed bodice and white embroidered collar

the same printed bodice and collar in close up, so the stitching is visible

another close-up shot of the collar, this time from the back

So three cheers for perfect fall weather, having the wardrobe to just bop off to a historical site in the right clothes (and right layers for the temperature) when invited, and friends who take a million photos so you get one where your face isn't doing a weird thing.

the author and friend smiling into a mirror inside a historic house

(And in case you're wondering: I am still embroidering on and off! But I don't have much to show for it yet, as I started a pretty big project after this and I've got about a third left to go. Stay tuned!)

Saturday, August 20, 2022

In Which Many Pickled Limes Are Eaten

It stands to reason that if you bring a jar of pickled limes made as faithfully to Little Women's pickled limes as possible, your fellow Alcott scholars can be cajoled into taste testing them.

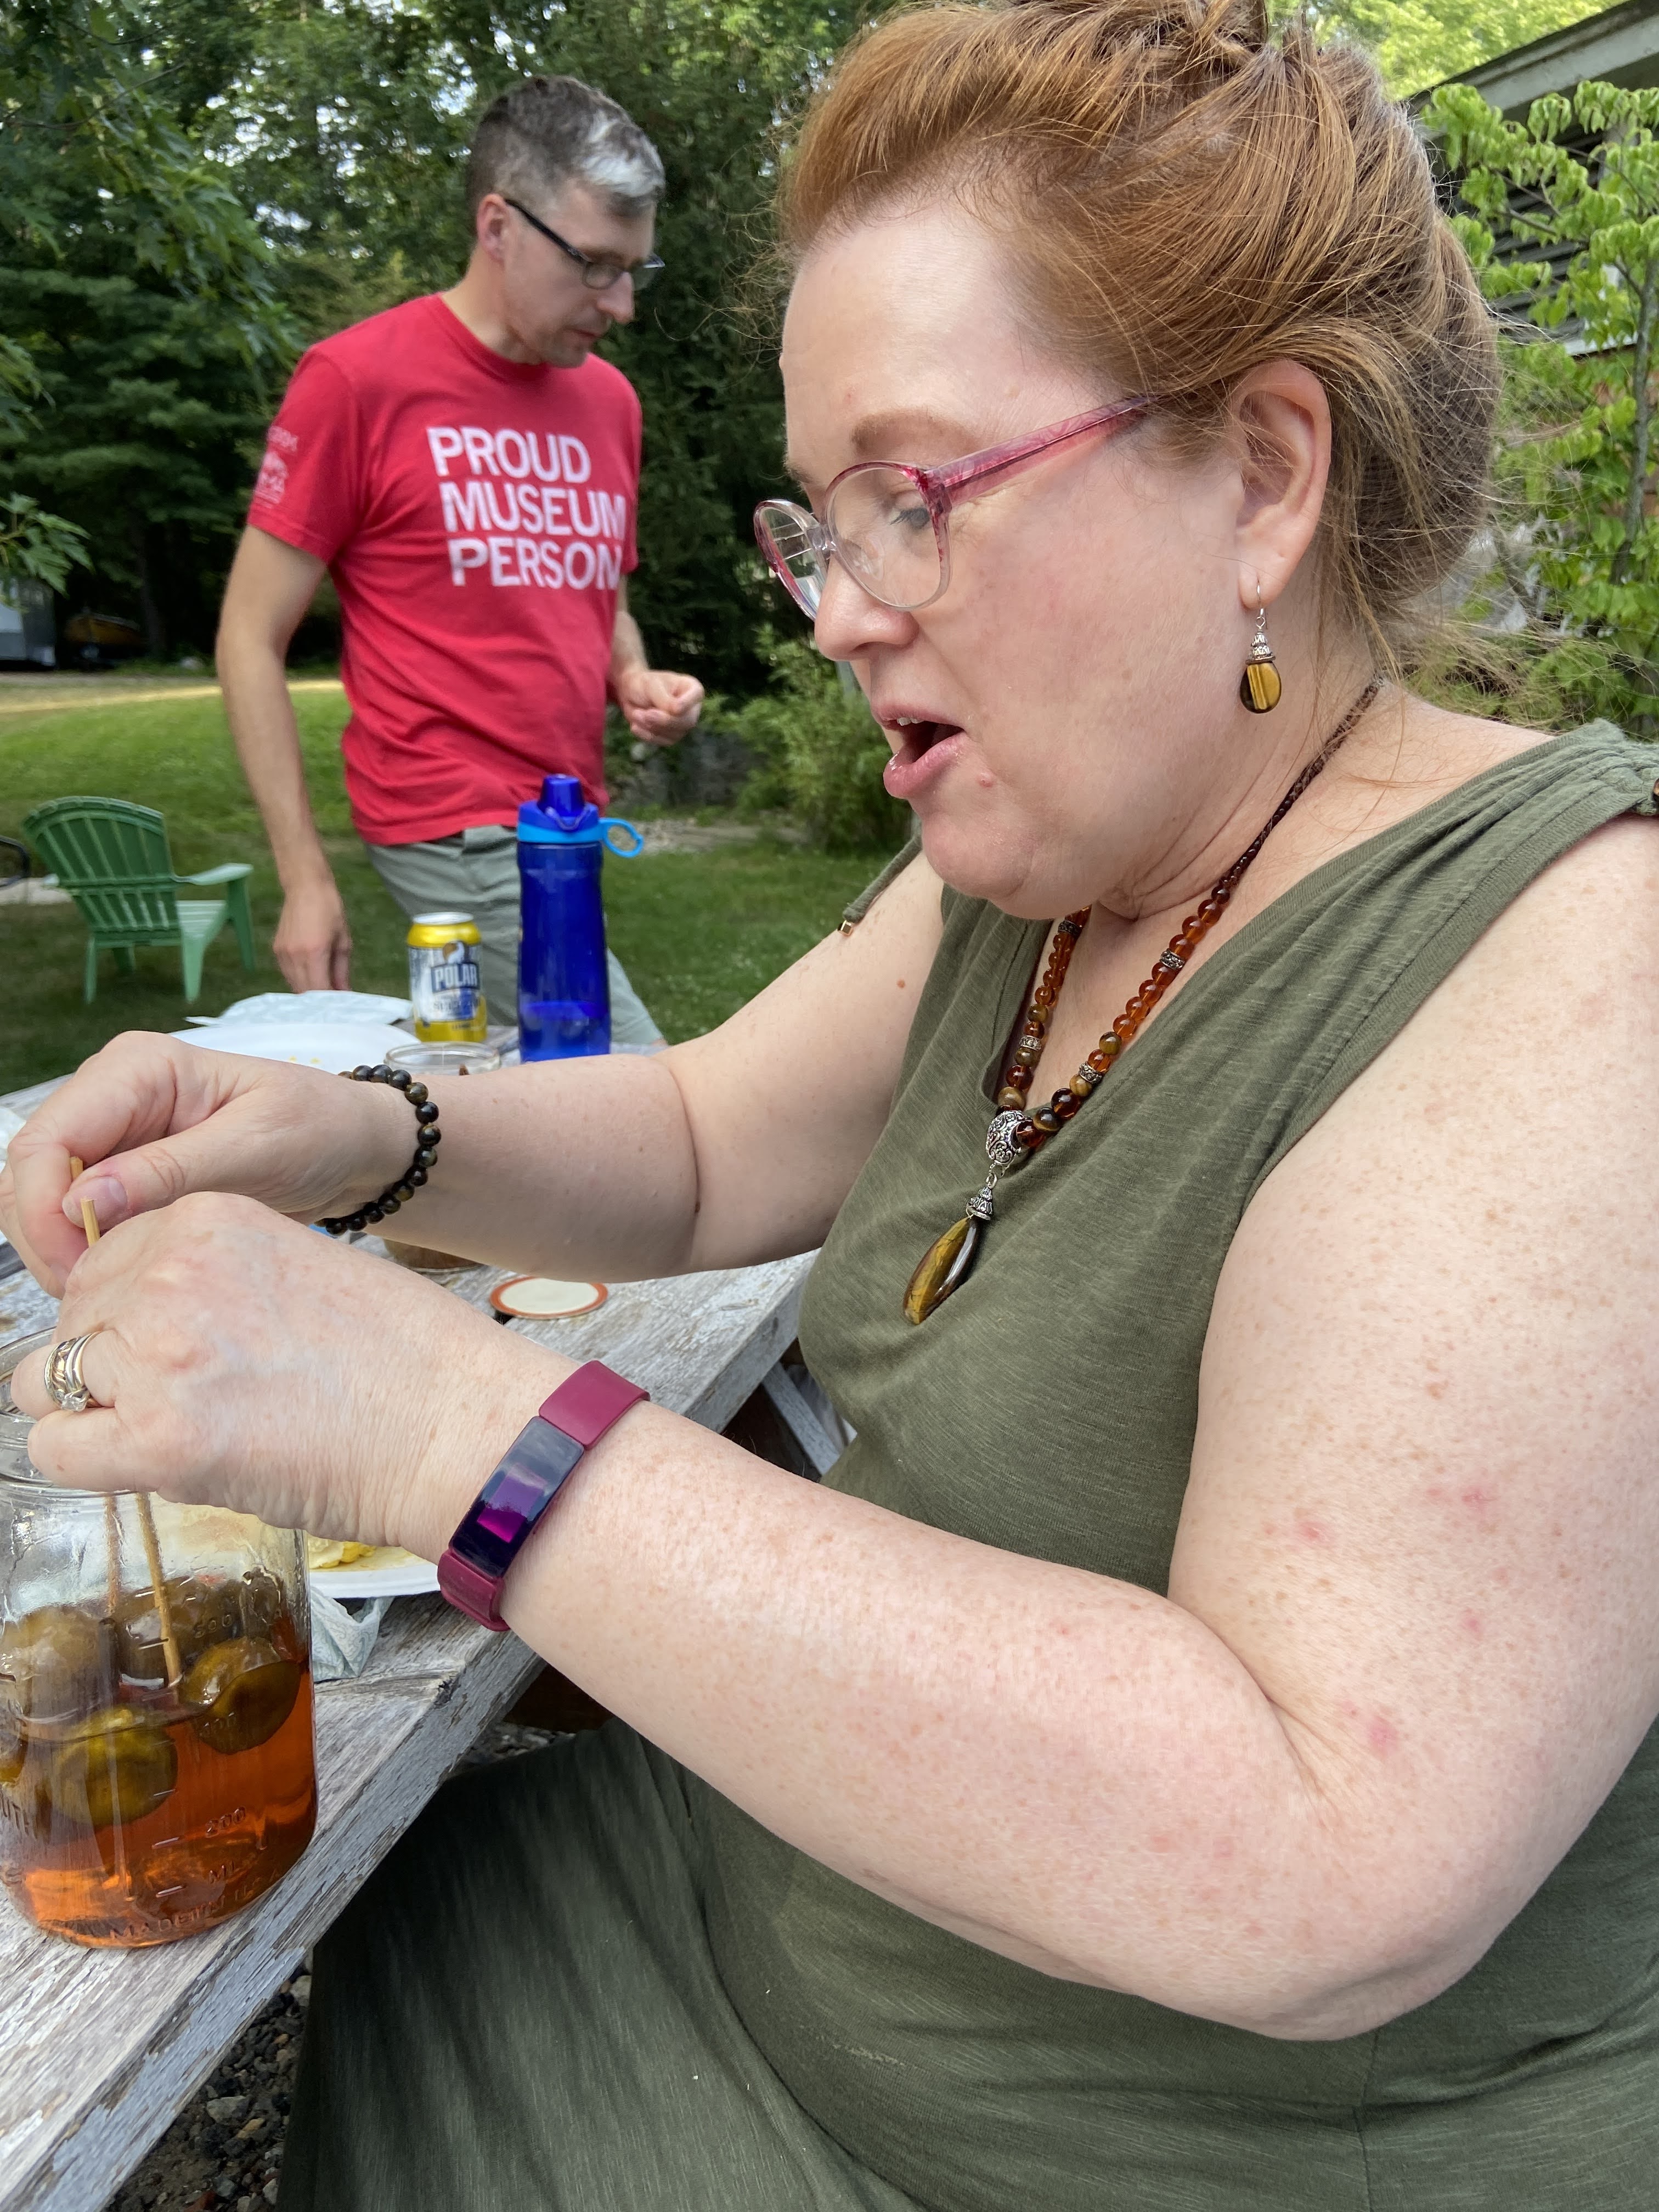
a woman bends over a picnic table and smiles at the camera, a skewered pickled lime in her hand

a woman sitting at a picnic table holds a pickled lime on a skewer over a paper plate

a red-haired woman wearing glasses uses two skewers to fish a pickled lime out of a mason jar

And so they were! Thanks friends.

In fact, both the sweet and sugar-free versions were such a hit I went home with motivation to make them again! So it's likely these will pop up in my future. But for now, let's review how this batch was made.

As with my first experiment, the limes were washed and then jarred with salt water using a 1tbs:2c salt:water ratio. They stayed in the salt water for 1 week, then were boiled twice in plain unsalted water. Changing out the water and repeating the process helps draw salt from the limes - it can be done many times, but I stopped at the second because I'm impatient.

close-up of two mason jars full of water with greenish yellow key limes floating in the liquid

a very similar image, this time with limes that are more yellow and brownish. Text in the image says "after 6 days in brine"

The limes went from bright green-yellow to a dull yellow-brown after 6 days in the brine. This color change is actually very similar to the first batch, which I thought was interesting! (Also, I'll be pulling in screenshots from my Instagram story on lime pickling for this, because I apparently forgot to save any of the process photos I was taking. Oops.)

a large pot filled with water and yellow limes. text on the image says "first we boil out the salt"

After boiling, the limes were divided in half and put into their jars while I got the vinegar mixtures ready. For the unsweetened mix, I used the same recipe as my first experiment, which comes from The Boston Cooking-School Magazine vol. 17 (1912): 

Make a brine strong enough to float an egg and in quantity to cover a dozen limes. Let stand six days stirring the brine each day. Drain and set to boil in two quarts of boiling water. Let boil fifteen minutes. Let drain and become cold. Scald one quart of vinegar half an ounce of cloves half an ounce of mace half an ounce of ginger root half an ounce of horse radish and one ounce o f white mustard seed and pour over the limes disposed in fruit jars. Close securely. These are best after keeping some months.

This recipe is half a century later than our target decade, but aligns pretty closely to the spices described in plum pickle and lemon pickle recipes I have from 1869. So I think it's a decent guess at what might have been used. I also ended up throwing in a couple of cardamom pods because I had them, and I like cardamom. But that was a personal addition!

a sealed mason jar filled with a slightly cloudy brown liquid and two whole cinnamon sticks visible

The second batch was the sweet pickled lime recipe I found in another volume of the same Boston Cooking-School Magazine (vol 16, also 1912). While period descriptions of pickled limes eaten in Boston explicitly say they are not sweet, I also have tariff records from 1824 listing "limes preserved in sugar" as an import. In fact, there's a number of sources referencing limes preserved in sugar or syrup throughout the 19th century. So while these aren't the limes Amy March was sucking on, I think it's possible she could have encountered them (maybe when on tour with Aunt March in Europe)...and I wanted to try them. 

The recipe is much plainer than the spiced vinegar brine:

[After boiling saltwater limes] Make a thick syrup of sugar and water using a half cup of vinegar to a quart of water. Cook the syrup until it is as thick as molasses, let it get cold. Prick each lime two or three times with a silver fork. When they and the syrup are cold put them together and let them stand over night. The syrup will then be thinned by the juice of the limes. If it is too watery boil it over again. Put the limes in jars and pour the cold syrup over them. They will keep indefinitely if nobody knows they are in the store closet.

I ended up using the leftover spiced vinegar from the unsweetened limes, but otherwise followed this exactly. When I make them again, I'll use less liquid though. The syrup took forever to thicken (there was a lot of water to boil out!) and I didn't have that many limes to cover. And as the instructions mention, I did have to re-boil a couple of days later after the juice loosened the syrup.

the author's hand holding a closed mason jar of yellow-brown limes floating in brown sugar syrup

It was hard to capture in photos, but you could actually see shimmery swirls of lime juice/lime oil floating in the syrup as the limes released into the sugar. After canning, both jars sat in a dark cupboard for about 6 weeks before we cracked them open for tasting.

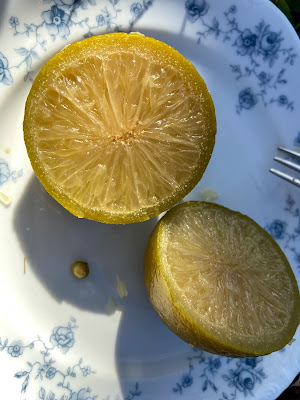
In the end, the limes made all the difference. Both of these versions were delicious! The unsweetened limes I think are best described as zesty, which I'd mostly attribute to the ginger and peppercorns in the brine. The cider vinegar zing was pretty mild, and the acid from the limes was also mellow. There was still a little bit of lime or citrus flavor, but it definitely didn't taste like a normal raw lime. The syrup limes were sweet (obviously), but had a more pronounced acid bite at the end which I think provided some balance and prevented the sugar from punching you in the teeth.

As long-time readers of this blog will know, I love historical foods. The more weird and surprising, the better. So I was always going to be excited about pickled limes. For me, the true triumph was the exclamations of "oh! this is actually pretty good!" from the most doubtful observers in the group.

the author looking over her shoulder while laughing. behind her, a woman chews and looks surprised
Jamie, pickled lime doubter, taste testing on mic for Let Genius Burn

So on that note, we close the book on pickled limes (for now). If anyone else makes their own, please let me know how they turn out! Cheers to delightful, surprising, and memorable historical food experiments.

close-up of an open mason jar with pickled limes floating in brownish syrup

Saturday, August 6, 2022

Winter Garments at Midsummer

In my recent recounting of the February expedition to Nestlenook, I mentioned that I wore a mix of old and new items. Even though we ended up planning the trip last minute and I didn't have a ton of time, I'd been thinking about skating clothes for years and was inspired to try and knock some garments out. And I did!

Though I do have a warm winter 1870s outfit (which I've worn on previous excursions), I wanted to do something with a more explicit skating theme, similar to these images:

Balmoral skirt advertisement, 1860s (via)
Jan. 1860 Harper's Weekly illustration of skating in Central Park, NYC (via)

Advert for a skating park in Philedelphia, circa 1860s (via)

Illustration of a lady ice skating with a support structure, 1867 (via)

The key elements that stuck with me when looking for inspiration were layers, gathered/bustled-up skirts exposing petticoats (but everything hitting above the ankle, where it would be out of the way for skating), and fur or knit trim on the coat or bodice. Also, all of my inspiration was 1860s...which makes sense, as I've spend a lot of time thinking about 1860s ice skating in particular while reading period letters over the years. So a vaguely 1860s ensemble it would be!

I thought I could get away with using the fur-trimmed bodice from my 1870s ensemble, worn with only the underskirt (looped up all the way around) if I added a contrasting petticoat underneath. Originally I planned to wear hoops as well, but when I decided to attempt throwing together a quilted petticoat I decided hoops didn't make sense.

Quilted petticoat c.1850-1875 (via)

Quilted petticoats were a common winter layer in the 18th and 19th centuries - while the style changed to support the popular silhouettes of particular decades, the basic premise remained the same. A skirt of wool, silk, or cotton was quilted over an inner layer of batting to provide warmth and insulation. Essentially, it's a wearable blanket. As an eternally cold human, I really wish these were still in fashion! If you poke around online, it's easy to find beautiful examples of quilted petticoats with all kinds of intricate quilting designs in addition to more utilitarian diamonds/straight lines. And while I really love the way they look, I just do not have the patience to hand quilt a piece this large. (See: the embroidered canezou I've been working on in fits and spurts since 2020.) But I wanted to be warm, and was interested in figuring out if I could do that historically, so I went for historical results and decidedly modern methods.

a bed with a light blue quilt spread out on it, and a cat sleeping in the middle of it

I found a lightweight cotton quilt with a pretty floral stitch pattern second hand that seemed like a perfect petticoat candidate. After a washing ("assisted" by a fluffy demon), I measured out the height I would need and cut the quilt down - I am in fact much shorter than a queen-sized bed. Then it was time to seam rip...and seam rip...and seam rip. I ripped all of the quilt stitching and cut the batting out of my "seam allowance" at each side where I would sew the quilt into a tube and at the top to give myself a lighter, unquilted section at the top of my hips (something I'd seen on originals). Then the quilt became a tube, and the tube became a skirt by attaching a deep cotton section to the top (so that the quilt started at my hips, rather than my waist).

That was as far as I got by trip day...as usual. I ended up throwing sewing materials into the car, and pleating the petticoat to the waistband on my friend's floor before we left. Then the waistband was added in the parlor of the inn where we stayed (with both of us sewing because I am slow). Onto my body it went, along with modern fleece leggings, tall historical wool stockings, a chemise, a corset, a modern thermal long underwear shirt (which I think is a not inaccurate as a layer), boots, and the "witch winter" velvet bodice and skirt. Layers don't have to be thick to keep you warm!

the author from the back, in motion ice skating
still perfectly mobile

I ended up borrowing a muff from a friend because I forgot mine at home, and I did put modern foot warmers in my boots after the sleigh (I have bad circulation and my toes were entirely numb). But aside from that, I was warm enough to survive an open sleigh ride! Which given we were sitting for a long time felt like a big achievement - ice skating, while incredibly fun, is pretty active so it's easier to be toasty.

The author carefully stepping out of a sleigh in the snow

The quilted petticoat provided a somewhat full shape, but isn't distinctly 1860s - since I think it's likely people in the 19th century continued to wear these kinds of practical garments for activities where fashion was less important, I'm ok with that. Overall, my approach of mish-mashing together items I already owned with new, stylish accessories felt like a very natural sort of way of ending up in an outfit. To me that's the difference between a "look" (as we might say in 2022) and real, lived-in clothes. So it works for me, even if I wasn't the most fashionably wide skater on the pond! 

(Although I probably was the widest skater on the pond...details. *waves hand*)

Speaking of fashionable accessories: I did make on of those as well. I knew I wanted to cover my head because that is a really solid approach to staying warm, and just as I was starting to think about how I would do so Vivien at Fresh Frippery posted a lovely convertible hood tutorial. Using her measurements as a guide, I was able to pull some checked brown wool and fur trim from the stash to put together a reasonable mid-century winter hood. And with the falling snow, I was so glad I had it!

an 1860s Harper's Bazaar page showing winter styles

making a silly face while testing fit 

also a fan of the rabbit fur trim

Altogether, I was immensely pleased with the ensemble!

the author standing on the ice with snow behind her in the skating outfit

Fast forward to late July...

I made it through a day of sleighs and skating and general snow shenanigans in my quilted petticoat. It was wearable! But it was not my finest work. When we got home, it went to the UFO pile to be fixed before it was put away...and remained there until last week, when I was inspired to write this post and wanted to finish the petticoat for real before blogging about it. 

a dress form with the blue quilted petticoat being worn, showing the messy and uneven pleats at the waistband
the rushed and highly uneven waist as I wore it in February

a bright blue section of the petticoat spread over an ironing board
Waistband removed, stitches picked, getting ironed for round two (plus a Drag Race cameo)

 I went back and removed the waistband and pulled out the pleats. After ironing everything, I measured and put in (more) evenly-spaced pleats. I even added closures! So now this is officially done and ready to be worn again.

the same sewing dummy wearing the quilted petticoat, which now has smooth and even pleats

a close-up of the back of the petticoat showing two hooks for closure
closures!

And as a final fun fact (and ultra-throwback): in the spirit of trying to minimize how many new materials I buy, I was able to make both the hood and the petticoat using stash materials (minus the quilt itself, which I bought). The bright blue cotton at the top of the petticoat was left over from a 1950s prom dress I made way back in 2014! That means this cotton remnant has been with me through 3 moves - oi vey. I'm very glad I was able to find a great use for it, even if it won't be seen when the petticoat is worn.

Sunday, July 31, 2022

In which I think fondly of freezing

One of the things I love about living in New England is experiencing four seasons - and complaining about them. There is something to love about every one, but it is also inevitable that after a month and a half or so of winter or summer I start to think longingly of the opposite meteorological experience. So now that we're settling into high summer and we're in the midst of a drought and a heatwave, please join me in reminiscing of snowy February, when my toes froze and staying warm was a top priority project.

the auther dressed in an 1860s ice skating outfit with hood, bodice, and quilted petticoat under an arbor covered in snow

In particular, last February I realized a childhood dream of going to Nestlenook Farm in historical clothes. Nestlenook is a Victorian-themed winter resort built during the Victoriana fad of the 1980-90s. As a kid, my family had a somewhat-annual tradition of going to an inn in New Hampshire during December or February school break to ski, snowshoe, ice skate, and generally do all the Winter Things. (Also outlet shopping...but that's less quaint.) Nestlenook was one of the places we would sometimes go on those trips, and the picturesque "historical" aesthetic spoke to my teenage costume-nerd heart.

the covered bridge we drive over to get to Nestlenook (internet photo, we were driving in the snow so did not stop for blog evidence!)

Friends and I have talked about going for years, but usually we're so busy, and good skating conditions so unpredictable, we never managed...until this year, when we somewhat last minute decided to go. We figured even if the weather wasn't great, we would enjoy getting away for the weekend in the bleakest month. 

The week of our trip, temperatures rose and the snow melted, and it looked like we wouldn't be able to actually do any winter activities...but then the day we left, the temperatures plummeted again, everything froze, and we even spent the day in light snowfall. We couldn't have asked for better weather!

snow falling on a bridge hung with pine garland, a snowbank, and snow on an ice skating area under the bridge


two women covered in a light dusting of snow over historical garments sit in a sleigh staring up out of the shot
I'm assuming our faces are because we were listening to a story from our obliging sleigh driver?

Our day consisted of a sleigh ride (on actual sleigh runners! not wheels! huzzah snow!) followed by hot chocolate, ice skating, and then dinner by the fire in the parlor of the inn. It was a lovely day! And then we went back for snow shoeing and more ice skating (in modern clothes) the next day because it was so nice to have such a large skating area! 
(Ok, that was a lot of exclamation points...but it was a really great weekend.)


I have a whole post coming about my clothes, which pulled from existing winter gear as well as a new hood and quilted petticoat. So for now, enjoy some photos of historical adventures in the snow. 

snow falling in front of a field covered in snow with trees in the background

A horse's head wearing a leather bridle
we were allowed to pet our valiant draft team after the sleigh ride


And in case anyone is wondering: I did not find it more difficult to skate in 1860s clothes (including a corset) than in modern clothes. I was able to bunny hop, skate on one leg, and spin just as well (or just as poorly) in historical garments as I can in modern ones. I just felt a lot more elegant!


Monday, May 23, 2022

An Alcott Research Roundup

A highlight of my winter was spending a couple of hours on Zoom with Jamie (an old friend) and Jill (a brand new friend), nerding out about research, historic house museums, 19th century fashion, and Alcott's novels. Today, some of that conversation will be appearing in season two of their fantastic podcast Let Genius Burn. In honor of that conversation, I wanted to revisit a few projects I've done over the years inspired by the Alcotts and/or Orchard House.

playing May Alcott or Ellen Emerson during the 2012 christmas program


Pickled Limes
In Little Women, Amy ends up in trouble at school because she brings pickled limes to class - something her teacher had banned because they were so popular and the girls kept trading them and not paying attention. I love historical food, so it's no wonder this has always stuck with me. But it's also such a familiar elementary school experience that it's just a favorite passage for me in general...maybe because I grew up in the era of pokemon cards and snap bracelets, both of which were banned in my own classrooms. (And which we also snuck in anyways!)

You can follow my research and experiments so far here. Plus, this one is ongoing! I'm about to start a new batch that will build on what I learned last time, and change some variables I didn't have a chance to try in 2020. 

Dancing in Little Women
My historical dance research is often driven by a specific reference from 19th century letters, journals, or novels - I love digging into what a dance mentioned by name might have looked like in the ballroom. And having spent so much time with the Alcotts and their friends, I reference their writings a lot when doing dance research! A few years ago I spent some time diving into Little Women specifically to explore what dances are mentioned, and how they fit into the story. 

Orchard House Centennial Lemon Coconut Pie
This is an oldie (and unfortunately the image seems to have gone away), but delicious! I worked at Orchard House during the museum's centennial in 2012, and shared this recipe (which I brought to share) from the year of the museum's opening.


And yes: it was very weird to be at the house in a time period other than 1860s!

Germans and Rose in Bloom
Many of Alcott's novels mention dancing - not just Little Women! Eight Cousins and the sequel Rose in Bloom are actually my favorite of Alcott's childrens' novels, so I tend to think about them a lot. I referenced a particular section of Rose in Bloom that discusses "germans" after we had one of our own.


Other Topics
In addition to the truly Alcott-themed posts above, my 1860s dress posts touch on different facets of Boston in the 1860s that overlap with when the Alcotts lived here. A few of particular interest might be:

Thanks for stopping by! Putting this together was a walk through the last 10 years of historically-inspired adventures, and I look forward to sharing many more.