 |
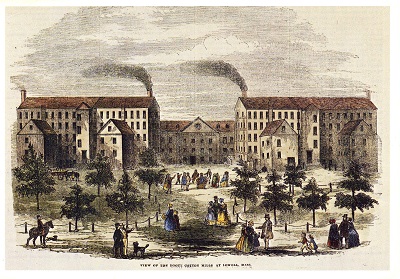
| period illustration of a mill campus in Lowell, MA |
Of course, during the 1860s new cotton fabric would be difficult to come by--the economies of the North and South were closely linked through cotton textile production, and so the Confederacy placed an embargo on raw cotton. With a lack of raw materials or employees (as many mill workers, known as "mill girls," volunteered as nurses or went home to fill in for men who had joined the army), many mills shut down until after the war. But there are so many mid-century cotton dresses, I think the association has stuck for me.
 |
| Boott Mills, Lowell (now apartments) |
At some point over the next few months while I was busy with other projects, this fabric started to tell me that it wanted to be a morning dress. I spent some time looking at extant morning dresses and fashion plates, and started to get some ideas--specifically, many of the originals I liked were trimmed with quilted silk, and I happened to have some in the stash!
The term "morning dress" referred to relatively simple dresses that closed in front, and were intended for wear around the house. Several styles appear in magazines, including a sack coat and matching skirt, a fitted dress with no waist seam, and a dress belted to define the waist (with or without an actual waist seam separating the bodice and skirt). Two notes I found interesting while looking at issues of Peterson's and Godey's Lady's Book for this project were that morning dresses intended for interior wear (as opposed to walking dresses or morning walking dresses) were noted as often trimmed with velvet, embroidery, or quilted silk; and that apparently in France morning petticoats were more expensive than morning dresses, because they were so finely trimmed or embroidered. This actually makes sense, as many morning dresses are open in front, revealing the petticoat.
 |
| Morning dress, 1863, with embroidered, tucked, and ruffled petticoat visible in front (from Peterson's Magazine) |
 |
| Extant morning gown, wool, c.1860-1864 (Historic New England) |
 |
| Printed wool morning robe with quilted silk trim and patch pockets, 1860s (Augusta Auctions) |
You can see my Pinterest board for this project here, but in general here were the elements I decided I wanted to incorporate:
-button up bodice
-full sleeves with cuffs that open to undersleeves
-quilted silk trim
-a patch pocket
-a belt with a bow
I also decided that since this project was not for an event (shocking, I know!), I was going to use it as an opportunity to focus on small details. So I made a particular effort to pattern match at the center front overlap, do something fun with the pocket (cut from scraps, so still an efficient and period use of fabric), and carry the decorative piping to the belt. Overall, I'm incredibly pleased with how it turned out!
(Please excuse the sad photos, obviously locations and materials were limited! Plus after I ironed the sheet it feel down and got wrinkled.)
The dress uses the Past Patterns 701 bodice, which has a nice full look from the gathers at the front and back. Then I altered the sleeves to be open at the bottom and stop just above my wrist, allowing my undersleeves to fill in the space below. The skirt is just rectangles finished at the front edge without closures and gathered to the waistband. The quilted silk trim is sewn on top of the bodice and skirt fronts, and finishes the neck and sleeve edges. All of the quilted strips are edged on one side with bright green silk piping.
 |
| Fiddling with button placement while I could still lay out the front pieces flat |
 |
| Piping what became the top edge of the sleeve cuff |
This dress also gave me a chance to try out several new techniques, including patch pockets and hand-worked button holes. I actually really enjoyed doing the button holes, and will no longer avoid buttons on projects! The patch pocket was less intimidating but equally fun to do. It's stupidly large because I wanted to be able to carry my cell phone in it if I'm wearing this for living history programs in the future. To ensure my phone would fit I traced my phone onto a piece of pattern fabric and then measured a pocket around it that seemed reasonably sized.
Then I folded the pattern in half and added a seam allowance, so that I could cut 2 pieces to create a chevron on the pocket. Because why not?
Since I've only worn this for photos to date, I haven't needed to carry my phone around. But I know I can, and that's what matters!
 |
| Period illustration, via |
I forgot to take pictures of the belt construction process, but it consists of a long belt piece, a square that becomes the bow, a small loop for the bow center, and 2 tails. The tails are sewn to the back of the loop, and then the large square and the belt are threaded into it. It makes the whole thing rather compact and gave me control over each element individually, which I think worked out well.
 |
| excuse the weird angle...bow selfie! |
Considering he has never used my camera before, and I was posing in front of a bedsheet taped to the wall, I think he did ok!
I look forward to making a fancy petticoat to wear under this in the future, but for now the simple look matched my mood. This was definitely a "make do" sort of photo shoot. But I appreciated the comfy-ness of this ensemble and the opportunity to experiment a bit with period hair without the looming deadline of a ball.
In the end, this project had somewhat ironic timing: as we're all staying home these days, it's rather appropriate to have a dress for wearing around the house. But I look forward to wearing this out in the future, for living history programs or just having friends over for brunch! In the meantime, I'll crack open a good book and continue to try to rope the cat into photos.
I hope you are all well!


Looks great! Your photoshoot turned out well, all things considered! ;) It's awesome that you did buttonholes successfully and are now more excited/willing to use them!
ReplyDeleteBest,
Quinn