Thursday, December 22, 2016

A Gaggle of 1830s

I don't know why, but "gaggle" just seems like the right term for people in 1830s clothes!

Through a mix of intention and serendipity, I wasn't alone on my 1830s adventure for Fezziwig's this year. A bunch of us ended up taking a break during the same dance to take pictures, so with help from an obliging gentleman we captured to shots of a bunch of 1830s ladies. I think what I love most about these images is how complimentary our ensembles are while all being totally unique to our personal styles.


So there you have it! I'll be away over the holidays for the first time, so things will be a bit quiet here until the new year. So have a very happy holiday season, and best wishes for 2017!

Thursday, December 15, 2016

Put a Bird On It

Last Saturday was Fezziwig's, and the first wearing of my 1830s dress! I was so pleased with the way this came out, from my petticoats to my hair. Best of all, while my hair definitely started to get heavy late in the evening, my dress was super comfy all night. That doesn't happen very often, usually something isn't sitting right, or pulls, or slides off...but not this time! It was a great feeling!


I've previously posted about the inspiration and construction of this dress, so all that's left to say is that I was quite pleased with my decision to use tulle as the sheer over-layer. It had an airy, invisible quality that made me feel like a Christmas tree topper.

basically the only picture that shows the vertical pleating on the bodice
the belt buckle I polished was a perfect touch!
My truly fluffy 1830s silhouette is thanks to a "carrot" bustle pad (like these originals) and a very not historical stiff net a-line wedding crinoline I bought on ebay for super cheap. When I first tried it on the net started about two thirds down my hip (because modern styles call for that), so I took it up with safety pins just before the ball to bring the fluff right up to the waist, where I wanted it. I threw a thin cotton petticoat over the top to smooth things out (I have a couple "all purpose" pettis that are wide enough enough for 1860s hoops but hemmed for wear without as needed), and that was that!


And then of course there was my hair, which was the bird on top of the tree. (maybe? no? not as good as icing on the cake, fine.)


The braid wreath is made of jewelry wire with fake hair hot-glued to it, then decorated with gold and red holly berries from the Christmas clearance bin at JoAnn's. It's pinned in and surrounded by my actual hair, which is curly so it's easy to blend. My plan had been to have a vertical loop in addition to the braid, like this fashion plate. After a collapse into a gluey, plastic-hair mess, the plan had to change. But I think the addition of the decorations make up for it, and maybe I'll try loops again for next time!


The side curls are bangs that I curled based on the Laced Angel's Romantic hair. They worked really well, because they saved my hair for anchoring the giant braid. The bird was a last-minute addition after a friend decided she didn't need it. It was the perfect touch!

I'd love to wear this again for a photo shoot, because I was so busy running around setting up/hosting the ball that I manage to look a bit rumpled in every picture...not to mention all my photos came out weirdly noisy. Harumph. But I was so happy wearing this dress, it doesn't much matter. I look forward to styling this dress in new and different ways (a tartan sash must happen, of course!) in the future.

Oh--and Mom's dress came out great too! She looked awesome.

I don't remember what was said but there isn't a single picture in which I'm not laughing...


Saturday, December 10, 2016

A Little Bit of Shine

One last progress post about my 1830s ensemble. I realized pretty early on that I wasn't going to get my act together on a sash like my inspiration painting, because at the point where the dress is real silk I want an actual silk tartan for the sash. And real silk tartan is hard to find over here! So I decided to pause until I could get exactly what I wanted, and in the meantime I am making a velvet belt with a buckle to wear for the ball. It will also give me some options for future wearings, because options are great.

Belt inspiration:

1832, Countess Julie von Woyna by Friedrich von Amerling
1826, Eugenie Hortense Auguste Napoleon de Beauharnais by Joseph Karl Stieler
1820s, FIDM
1832, Le Journal Des Dames et Des Modes
I did some internet searching, and found a lovely antique belt buckle on Etsy that was a good, sort-of-rectangular shape. It was super cheap, probably because it was so tarnished it was basically black! So after ensuring it was actual brass (and not just brass plated), I did some scrubbing with lemon juice and baking soda. What a difference!

upon arrival--it looks shinier here than it did in person

while polishing-I used a toothbrush and paper towel to alternate circular wiping motions and attacking the tiny crevices

good as new!
It's amazing what a difference accessories make. It really brings the ensemble together!

Sunday, December 4, 2016

"Funemployment," or, The Luxury of Indecision

I am very excited to say that I got a new job, and I had a whole week off in between! So this week I've been enjoying the luxury of working on projects and finals without anything else on the books--just get up, sew, do homework, sew more, etc. Glorious!

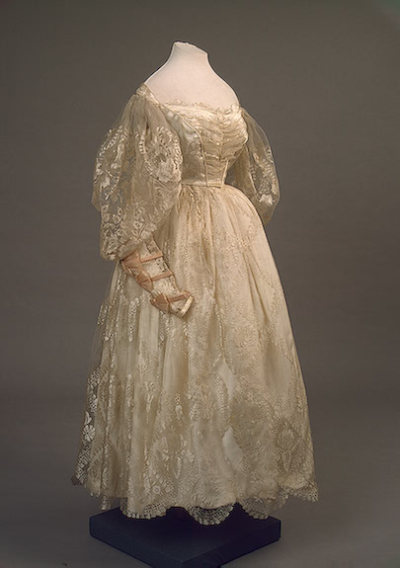
This includes two big developments: I am almost done with my 1830s dress, and I decided to make my mother an 1850s outfit for the ball. So I've been hard at work! Both dresses were tried on for the first time this evening for last alterations, and I am unspeakably pleased so far. I promise to post detailed pictures once they've been worn and photographed, but in the meantime I have some cell phone progress shots. Because I had time to think about taking progress shots! And only swore a lot of the time but not all the time! Ha.

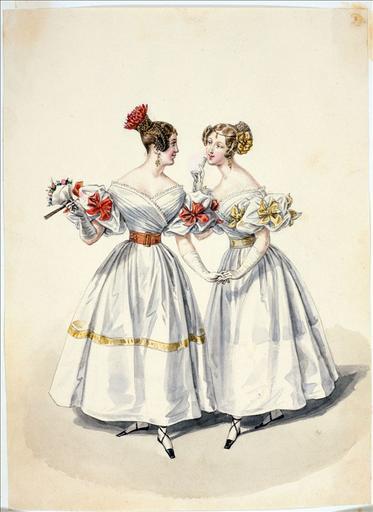
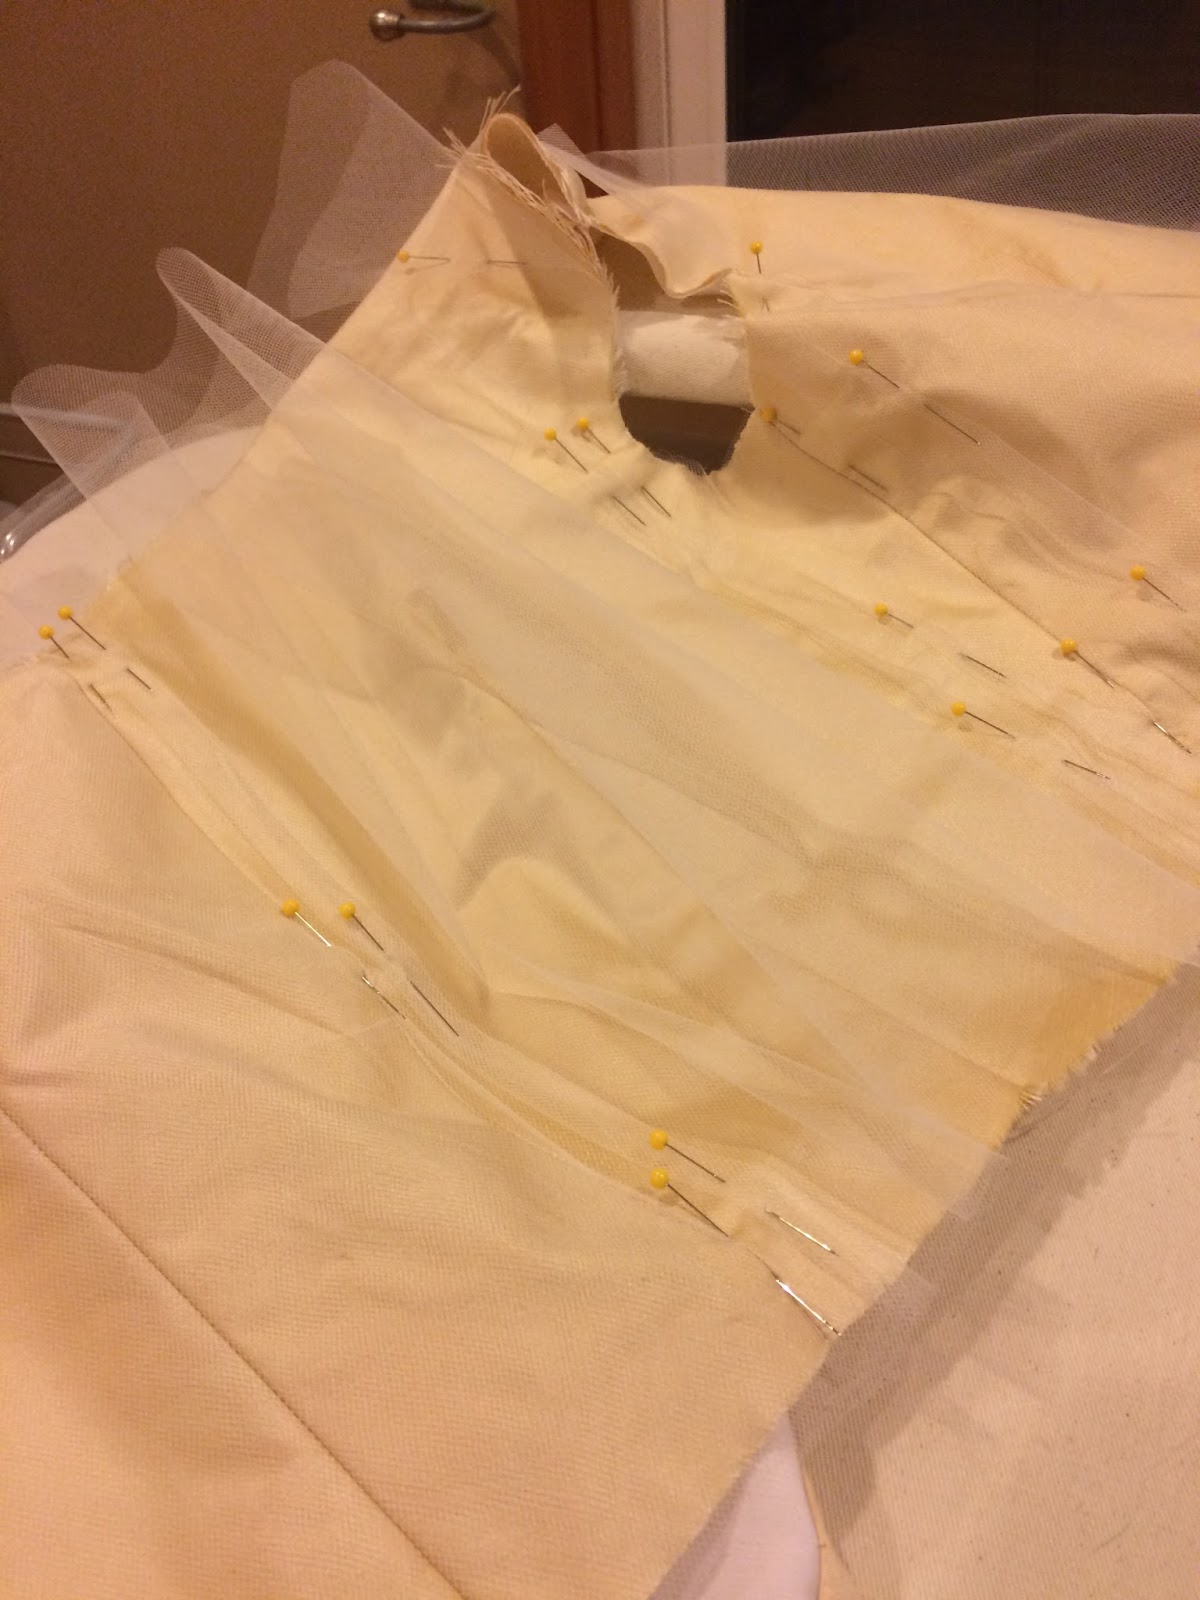
Before my week off, I actually did some significant work on the bodice beginning in late October, because we had sewing circle. Over the course of the October and November sessions I mocked up the pattern (TV455), made adjustments, and assembled the actual bodice so that I could have help fitting the darts. I find it much easier to have someone do that while I'm wearing the bodice! Then I cut an overlayer out of my bridal tulle that was wider across the front and back than my actual bodice (but actual size around the arm holes). I matched the arm holes and shoulders of the bridal tulle, and then painstakingly created tiny folds to pleat up the excess width. I tacked each tulle pleat to the silk bodice in three places (top, waist, bottom) as invisibly as possible, then bound the neck with piping and added a non-tulle-d waistband, which further lock down the pleats.

matching up the arm holes to start pleating the tulle

checking the look halfway

pleats!
I also created long tulle oversleeves and short puffed silk undersleeves and attached those over Thanksgiving, so the bodice was in pretty good shape before my week off (which also never happens). I'd also already cut and assembled the skirt, so I had a large tube ready to go. This is when that indecision starts--I originally planned to make a padded, three-dimensional rolled hem in silk at the bottom of the tulle overskirt. I messed this up right away by sewing it together upside-down, and had to pick itty-bitty stitches out of the tulle (which took forever and was absolutely miserable), then once I'd fixed it, stuffed the tube, and sewn it shut...I decided I didn't like it. It seemed clunky, it wouldn't lay right, and it just made me sad! So I slept on it, and didn't touch it the next day. Instead, I worked on my mother's dress so that I felt good about progress. When I went back to my dress, I decided that yes, I really did hate the overskirt. So I made an entirely new one (luckily I had enough tulle) with no hem decoration and basted it to my silk. The two layers are cartridge pleated as one to the waistband, and the excess tulle (folded to the inside to adjust the length) adds some nice volume--almost like an extra petticoat.

Speaking of cartridge pleating...I did that! I usually don't have time, because it is hugely time-consuming. But I love the way they make the skirt hang, so since I had the time I took advantage of it!\. To further help give the skirt some body, I used craft felt to pad the skirt hem (based on this blog post). I sewed my felt to the silk as a facing, so it was super easy, lightweight, and rather stiff. It's not perfectly accurate, but not horribly off either. Definitely a trick I'll keep in mind for future skirts.

facing the hem with felt

marking cartridge pleats
stitching the pleats while watching The Crown, which I greatly enjoyed! Also, cat, because of course she needed to be on my lap for this

pleats drawn up and pinned to the waist

from the front
 I've also started finishing all the little bits, like putting cuffs on the sleeves and bias-binding the sleeve openings. I still need to sew down the neck piping and add closures, but otherwise this is basically done with a whole week to go until the ball! INSANITY. It's a pretty great feeling. (or it would be, but also finals. Still, better than sewing and finals...)

cuffs and binding on the oversleeves
My mother's dress is in pretty good shape as well-the bodice is done except for closures and hand finishing, and has been passed off to Mom to finish on her own this week. I measured the skirt for length this evening after assembling and hemming it over the week, so now I can adjust accordingly and attach it to the waist band. Then that's it, she's done too!

cutting the lining from scraps of Christmas print, because why not!

laying out skirt panels
On to Fezziwig's!

Wednesday, November 16, 2016

1830s for Christmas

Despite a crazy fall (shenanigans! upheaval! homework!), I really wanted to make a new dress for Fezziwig's Ball, our annual Dickensian extravaganza in Salem. I've had a particular image sitting on my inspiration pile for ages, for an obvious reason...

portrait by Alexandre-Jean Dubois-Drahonet
it basically fulfills all of my love of 19th century romanticized Scotland in one go, with the tartan sash and the thistle hair. I haven't been able to find much information about this portrait, but my best guess is that it was done between 1828-1831 (when Dubois-Drahonet died).

It's not a period I do, so I've never had an excuse to make an 1830s ensemble. Fezziwig's is really the only opportunity, because the dress code is just "the life of Dickens"--1830s fits the bill! So this year I decided that was going to be my one project. And I'm up and running! I am really pleased with how things are going so far.

For the actual project, I decided what I liked best about this portrait was the sheer over-layer, especially the sleeves. So I went looking for extent garments with similar features, and found a few that spoke to me:

1820s, Kent State collection
1829, Bath Fashion Museum
1830, FIT
1830s, Stete Hermitage Museum
1832, LACMA
I also found several descriptions of dresses from 1830-31 with "sheer net oversleeves," and so I decided to use bridal tulle to make the over-layer instead of something like sheer organza. I'm not sure this is really fine enough, but it looks good so far--light and floaty and almost invisible, so I'm happy with it.

I'm excited to share more progress on this project as construction continues!

Monday, October 31, 2016

In Memento Mori: Mt Auburn Cemetery and the Rise of Rural Cemeteries


By the second decade of the 19th century, urban areas like Boston found themselves running out of space to bury their dead. As a solution, architects turned to the suburbs to build a "rural cemetery" where there would be space for the dead to rest peacefully. The first of this new type of burial ground, Mount Auburn Cemetery, opened in Cambridge in 1832. Mount Auburn was built by the Massachusetts Horticultural society and modeled on natural garden landscaping of the English countryside, sprawling across 72 acres.

Gate to Mt Auburn Cemetery, 1860s

It started a movement for larger burial sites outside of the main urban environment, where visitors could spend time in the garden, visit loved ones who had passed, and commune with nature. Mount Auburn's founders envisioned a site that "commemorates the dead in a landscape of exceptional beauty and tranquility; providing comfort and inspiration to the bereaved and the public as a whole." The site included monuments, hills, a wide variety of plants and trees (including exotic samples), walking paths, ponds, and in the latter half of the century a tower with views of Boston. While Mount Auburn served as a place to bury the dead, it was also a large natural space with many nooks to explore and enjoy.

Illustration of the Mt Auburn Grounds
The idea caught on. After Mount Auburn came Mount Hope (Bangor, ME) and Laurel Hill (Philadelphia, PA) in 1836, and more in major cities throughout the next few decades. These spaces were "experimental gardens," providing public green spaces with nature, sculpture, and quiet where families could picnic, stroll, and enjoy the air outside the city. Rural cemeteries provided sanctuary to both the living and the dead, a communal location for gathering.


It's an interesting idea--the living and dead enjoying nature together--one that's fallen off in popularity in the 21st century. But you can still go walk in Mount Auburn, and it's definitely worth the trip.


Images in this post are either courtesy of the Mount Auburn Cemetery site or from the Holliston town burial ground, shot with my Petzval.

Thursday, September 1, 2016

Optics and Adventures: An Island Climb with my Petzval Lens

Last weekend I stepped back into the 1920s for a getaway at the Oceanic Hotel on Star Island. Built in the 1910s (and not much updated since), the Oceanic really feels like stepping back in time, and the island is a beautiful place to take an electronics break for the weekend. I was excited to do some photography while we were there, and on Sunday we went for a walk to explore the rocky outcroppings on the island. I brought along my Petzval, a reimagined 1840s portrait lens. The optics are very different than my modern lenses, leading to a small single point of focus and swirly, blurred edges. In bright colors, like this weekend, it gives the photos a sort of dreamlike effect that I really love. Plus, the focusing knob (a small dial on the bottom of the lens shaft) is the same style of mechanism as the original--without auto image stabilization and focusing support, it's a very different, more deliberate shooting process. Another good way to feel like I'm stepping back in time.


I'll do another post about the event itself, but for now here are the fruits of our adventure as seen through an old-fashion optical marvel.