
 |
| look ma, no pins! |
When I originally decided to embark on this project, I spent a long time looking for inspiration. My original plan was based on this extant dress, worn to a ball at Balmoral by the Princess of Wales in 1863:
 |
| Note that at some point in the 1930s it was re-fashioned for wear at a different ball at Balmoral (worn that time by Queen Alexandra) so I am unsure how much of the skirt situation is original vs. from the re-make. |
 |
| looking at it now, I realize I reversed the bodice sections...ooops. oh well, too late now! |
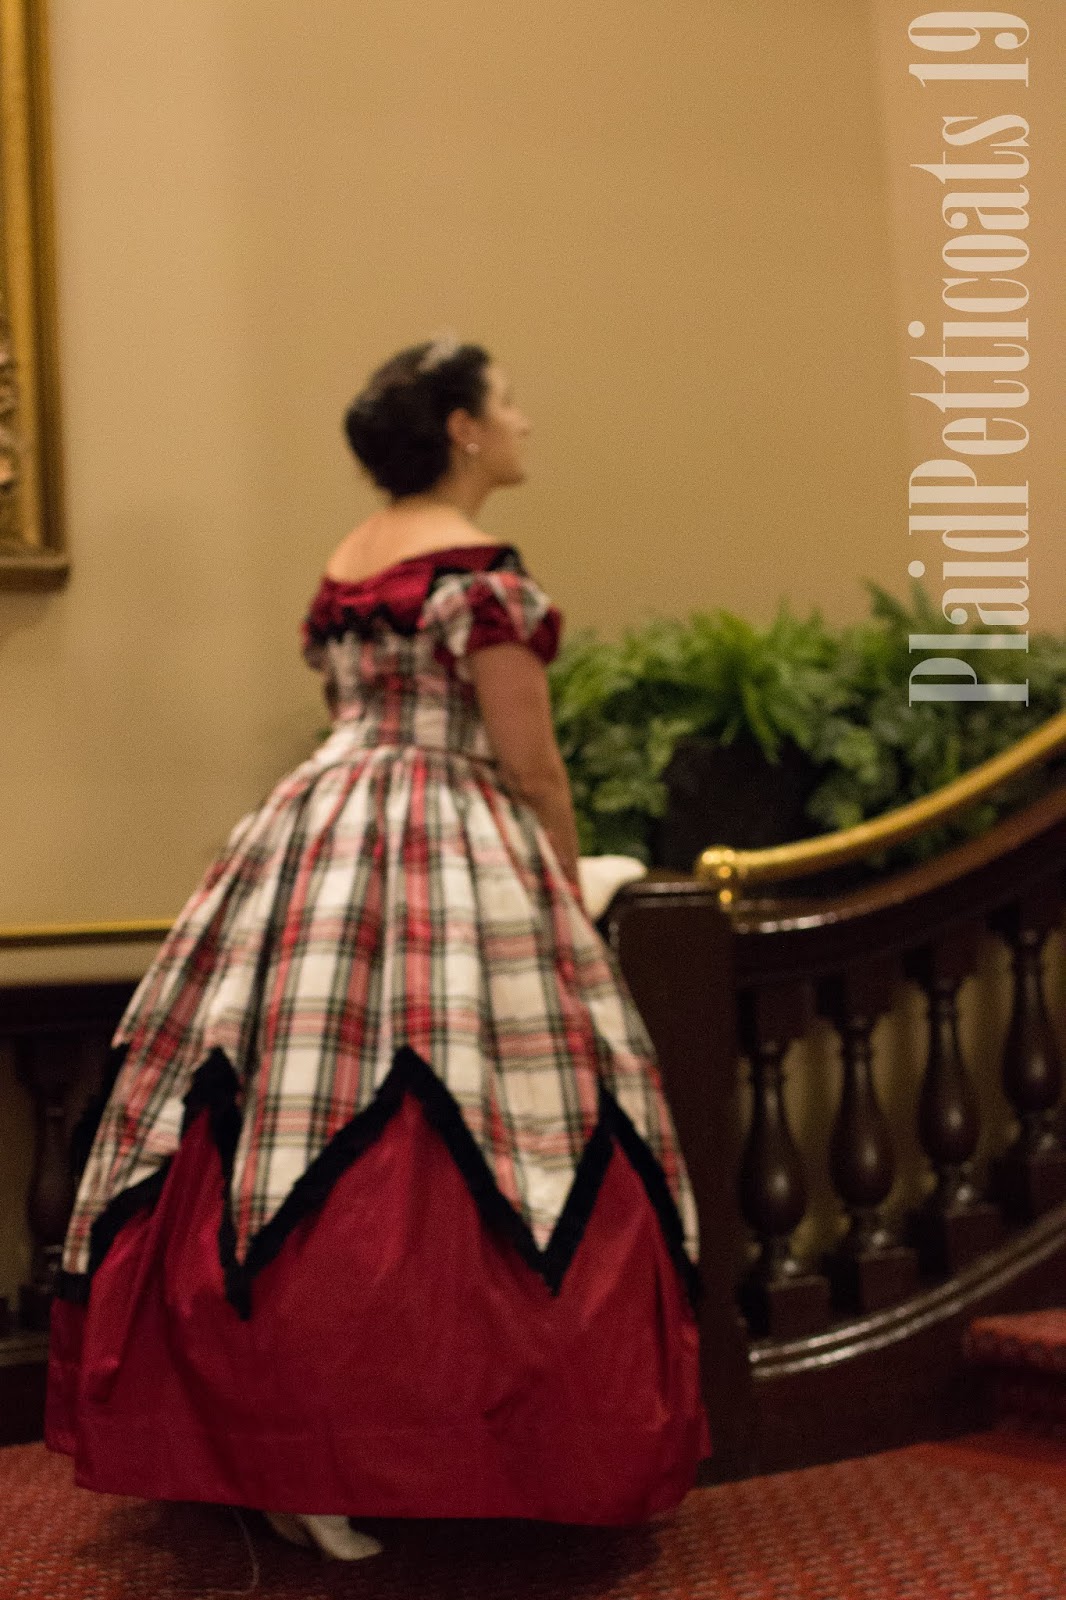
So that was my new target. As I was short on silk, I spent a lot of time fiddling before I actually cut anything out. The underskirt was a good place to start: I used a historical trick and made the bottom half silk, and the top half (hidden by the overskirt) cotton. I had to piece a small portion of the silk, but now it's in the back and not noticeable when I wear it.

And then came the bodice. As I mentioned, this was the most complex 1860s bodice I had ever attempted, as it required a careful assembly order to ensue that the right things overlapped with each other. My original plan was to construct the entire bodice out of a medium-weight cotton (that petticoat fabric I mentioned) and then apply all of the silk onto the cotton base. This...did not work. Like, not at all, it was a huge disaster. Luckily, plan B went a bit better!


Plan B was that I assembled the bodice in stages. Stage 1: I cut out the top third of my usual 1860s bodice pattern in red silk, and flat lined that to the cotton lining that I had taken apart from plan A. (All of the red silk was pinked, as I knew a lot of edges would be raw.)
Stage 2: I cut the bottom two-thirds of my usual 1860s bodice pattern in tartan silk, and then created a zig-zag edge by scaling down the triangle I used to cut the zig-zag edge on the tartan overskirt (which I had done first--I used the zags I cut out for the sleeves and shoulder points). I then bound the zig-zag top edge of the tartan bodice pieces with cotton.
Stage 3: I flat lined the tartan bodice pieces to the cotton bodice pieces over the silk, leaving the zig-zag edge loose.

 |
| I pull my basting stitches after assembly, so I like to baste in crazy neon colors. This project got lime green! |
Stage 4: I assembled the bodice as usual.
Stage 5: I cut (and pieced where needed) wide bias strips of red silk, which I folded in half to create mock pleats. I pinned these in place on my dress form, then took them off and replaced and stitched down each level 1 at a time so that the edges are all hidden in the overlaps. The final row of pleating mostly ends inside the tartan layer, which hides the ends (and is why I left the zig-zags loose earlier on).

That was the majority of the weird bodice construction. The little points around the armscye and the larger ones on the sleeve are just bag lined with cotton to create finished edges, since you can't see much under the ribbon (well, you can't now. I hadn't gotten sleeve trim on by the ball). The bodice is boned along the back, seams, and darts, and closes in back with hooks and bars.
The one true moment of panic came when I realized that 6 days before the ball I had not begun to attach trim. There are about 15 yards of pleated velvet ribbon on this thing...next time I try to finish planning a wedding and sew a new ballgown at the same time, someone hit me upside the head so I can't. But minus the sleeve trim, which went on afterwards, I got it pretty much done!

There are a couple of bodice things I'd like to fix, and I really need a bigger hoop, but really--I'm so happy with this project. Which is good, because that metre of tartan silk I bought to boost my scraps? It was the end of the factory's supply. There's just not much demand for it anymore, which is sad...and also means next time I'd need to have it custom woven, and that is way outside my budget. So this will have to be my one, well-loved tartan dress.

No comments:
Post a Comment